Warehouse Location Management
PrepBusiness lets you create named storage locations (bins, areas, shelves) within your warehouse and assign inventory to them. Location assignment is done manually through the web portal; there is no mobile app or barcode-scan-to-shelf workflow.
Setting Up Locations
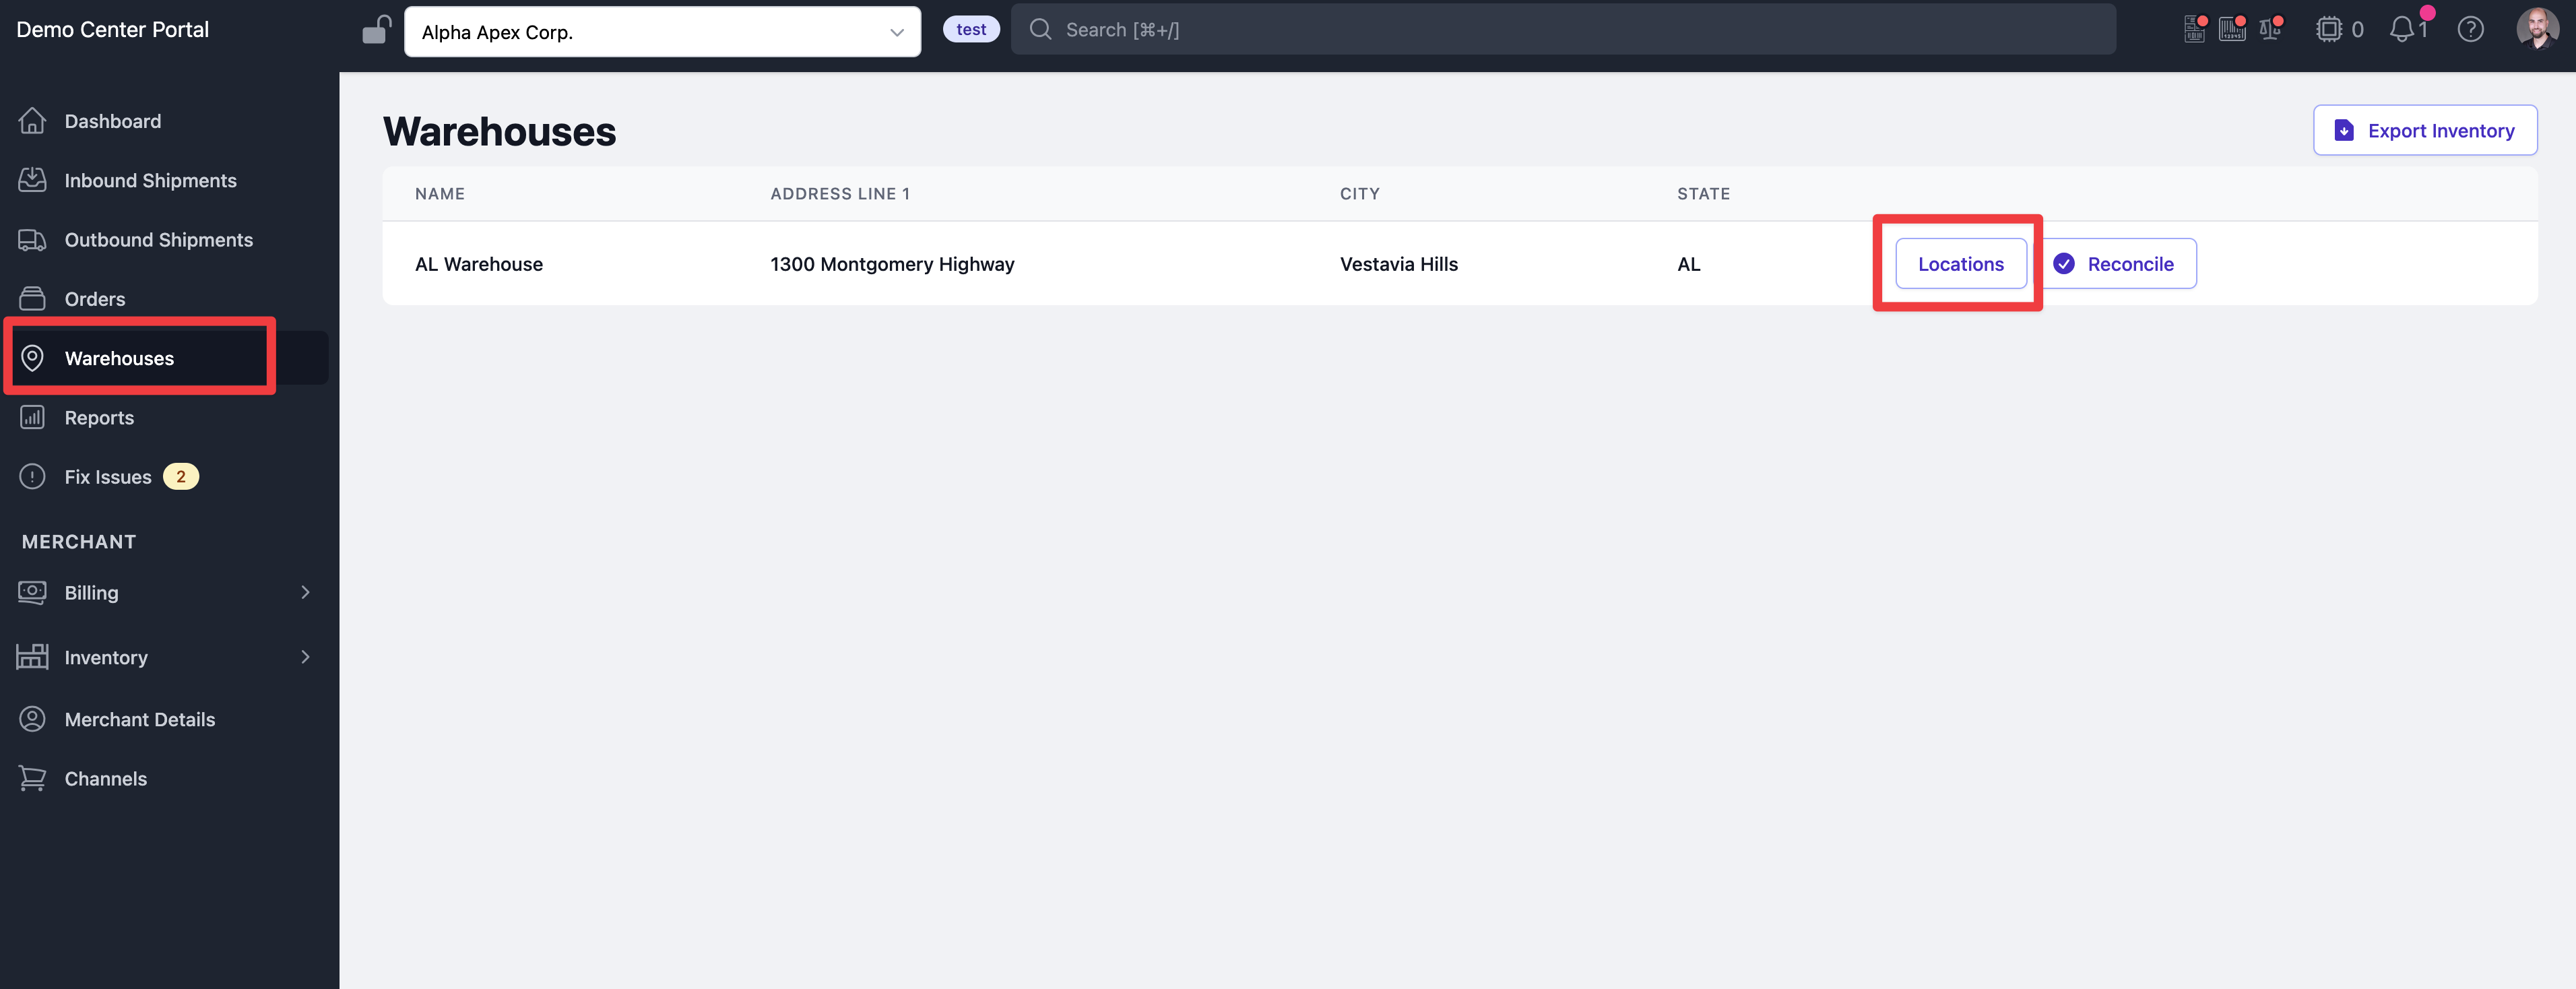
Navigate to Warehouses in the left sidebar, then click the Locations button next to your warehouse.
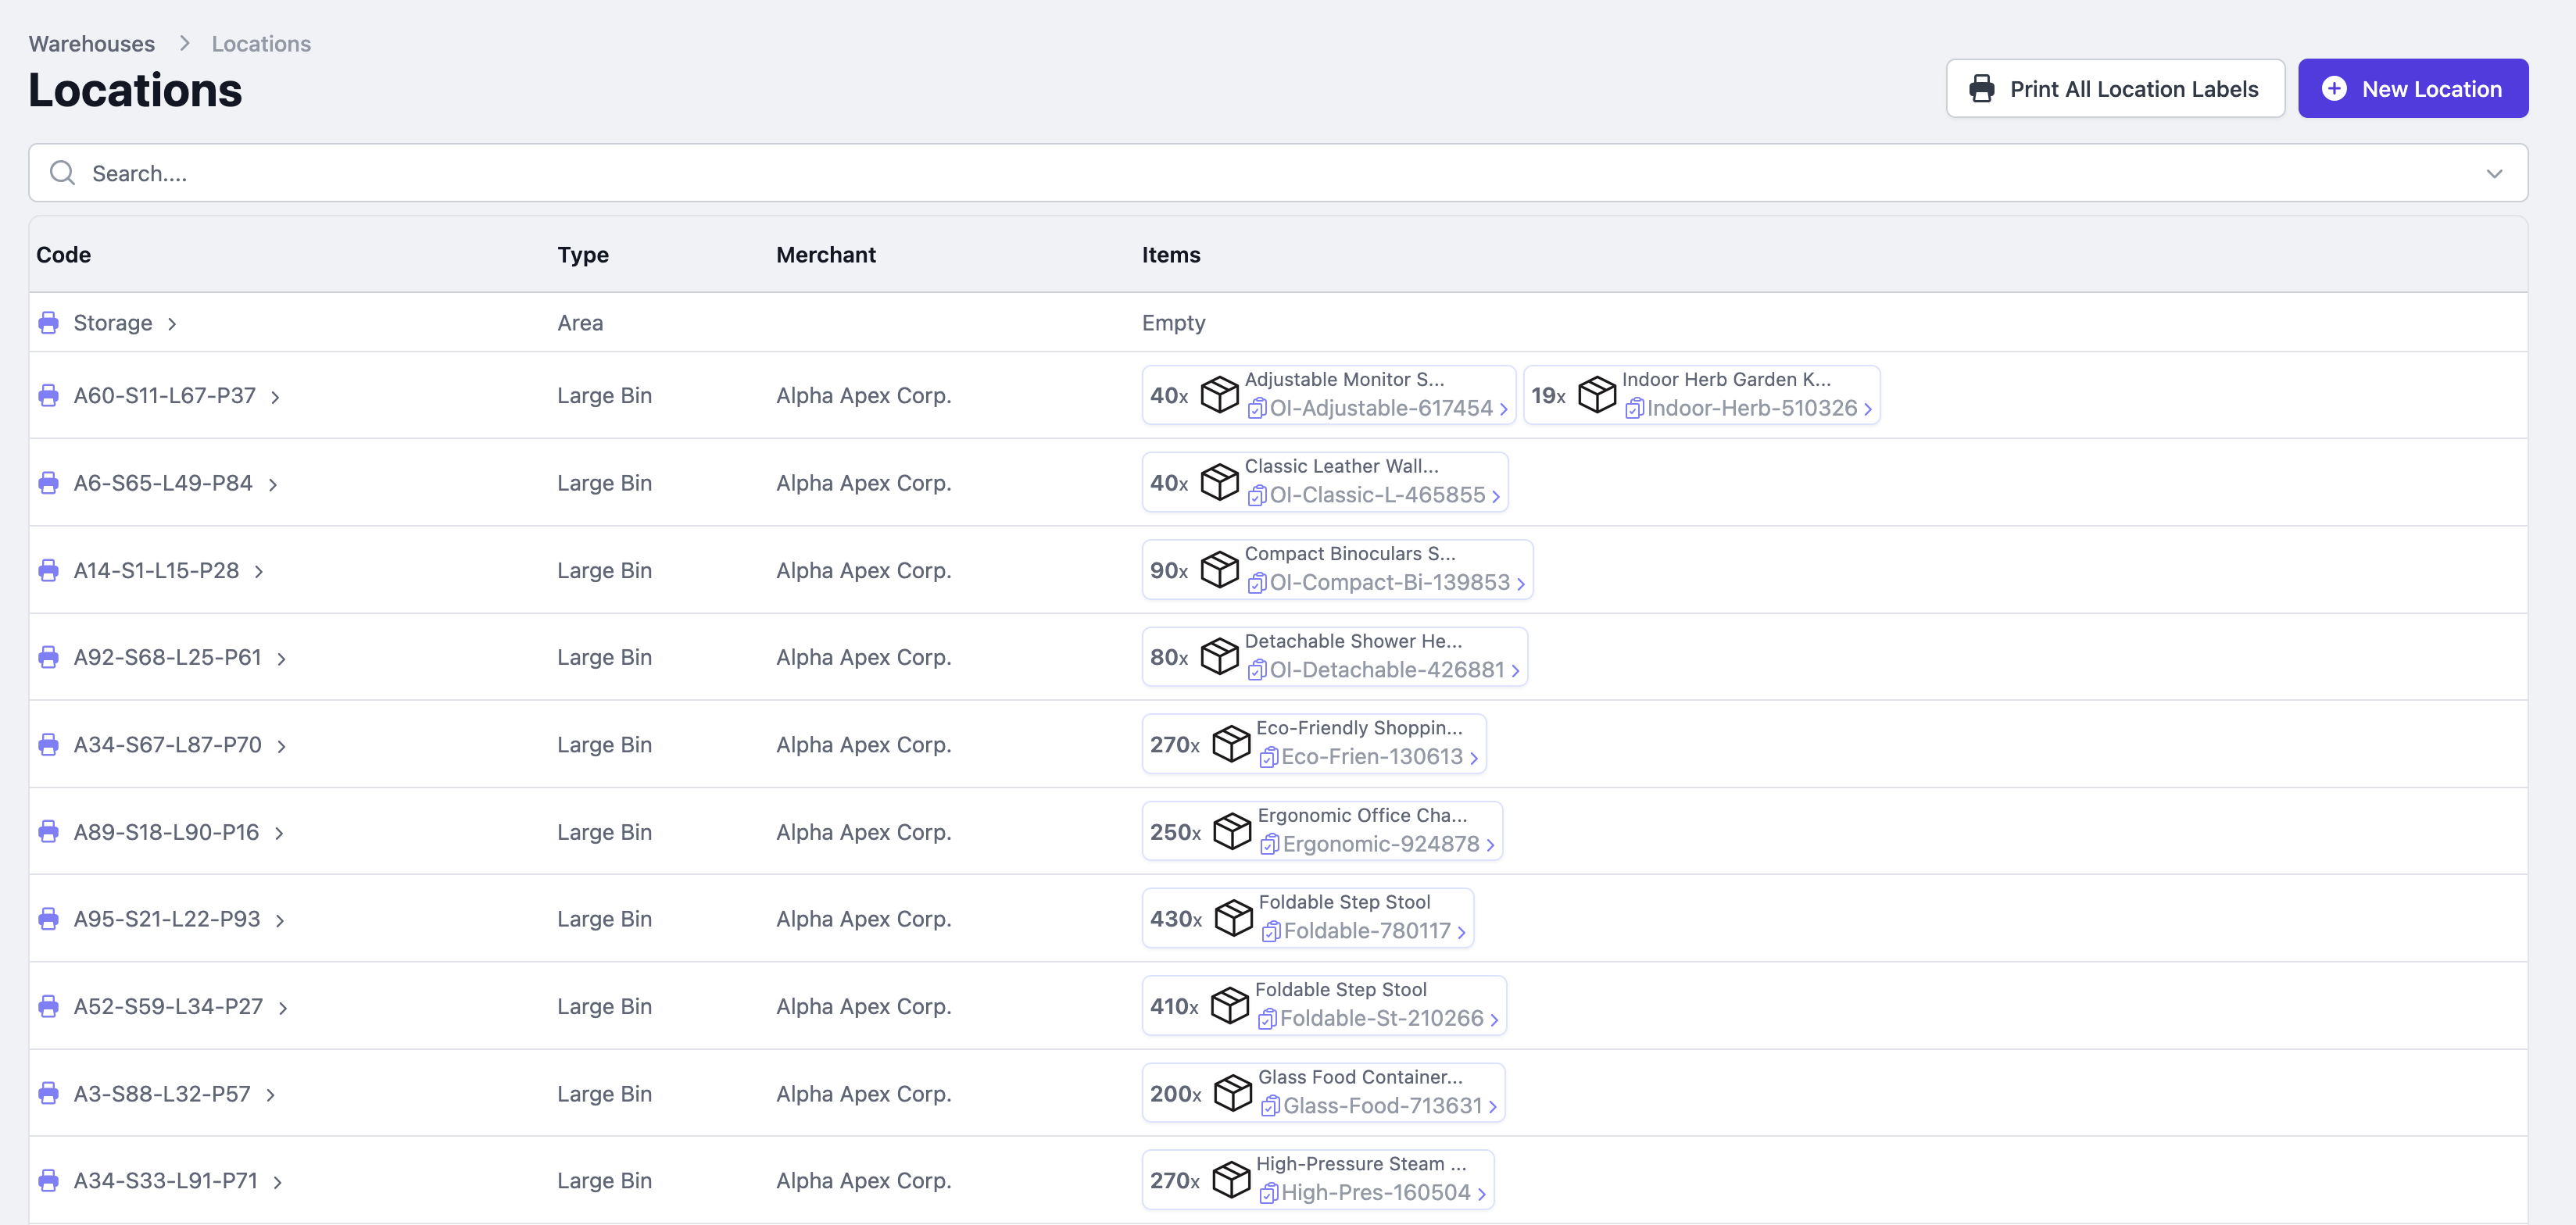
The Locations page shows all locations with their code, storage type, merchant, and the items currently stored there. You can print labels for all locations using Print All Location Labels.
Creating a New Location
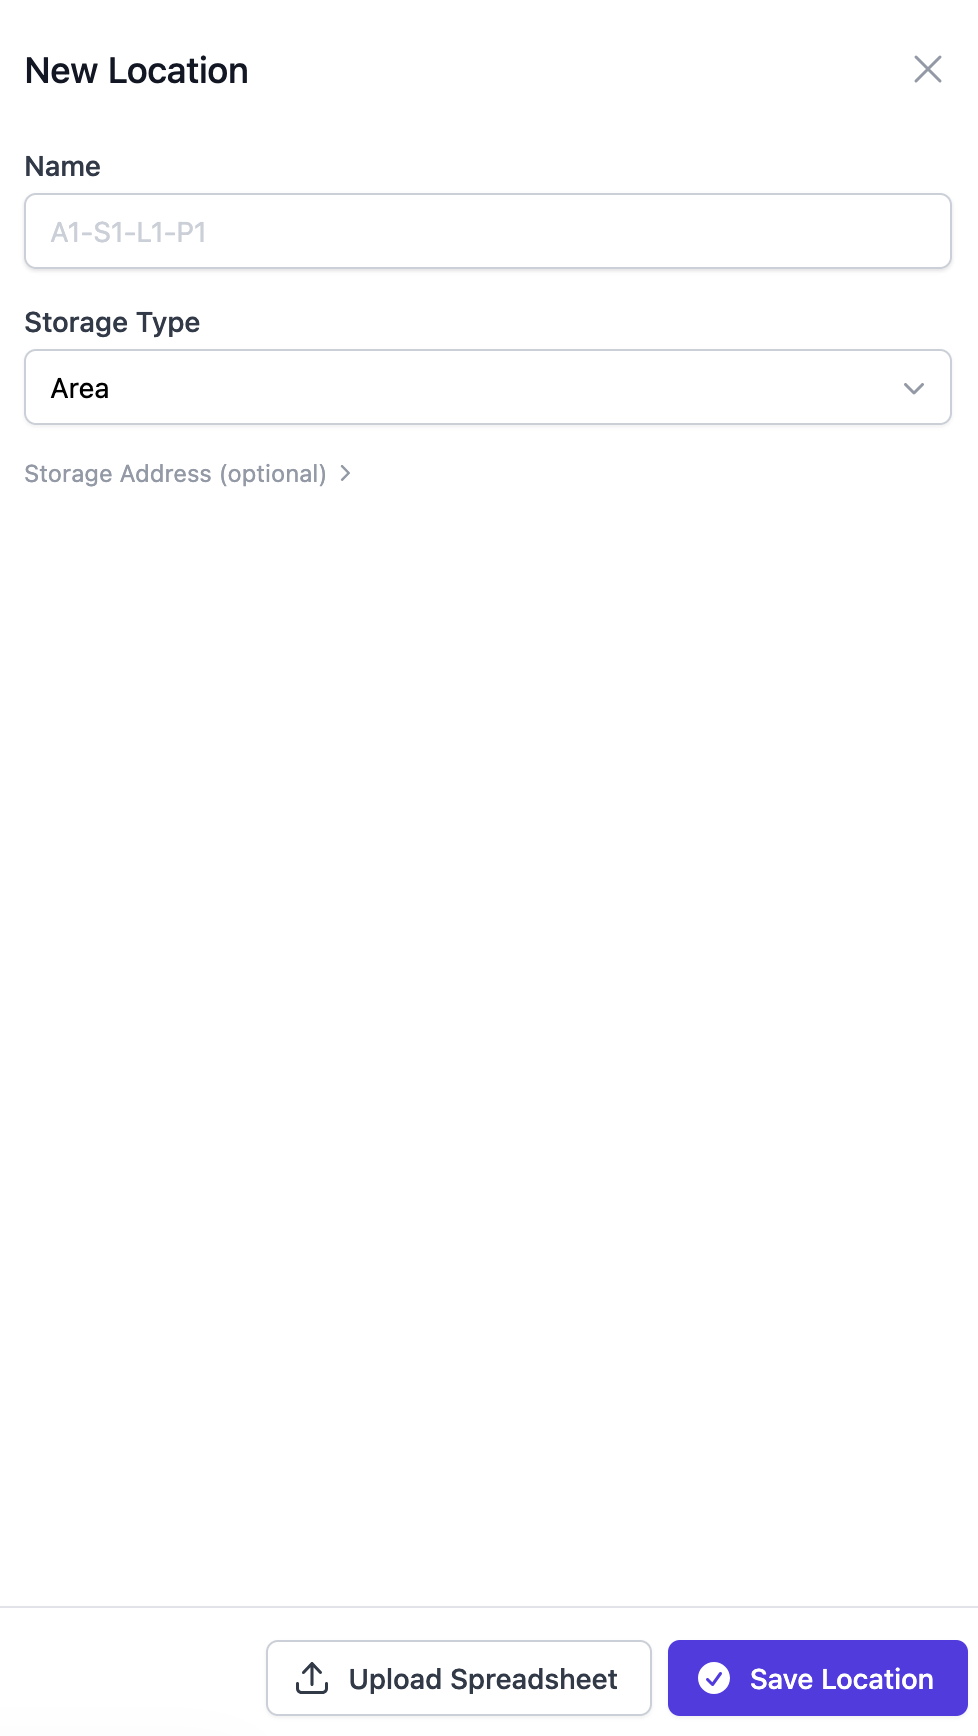
Click New Location and fill in:
- Name: a unique code for the location (e.g. A1-S1-L1-P1 for Aisle 1, Section 1, Level 1, Position 1)
- Storage Type: Area, Large Bin, etc.
You can also upload a spreadsheet to create many locations at once.
Assigning Locations During Receiving
When receiving an inbound shipment, each item row has an Add Location button in the right-side actions menu. Click it to assign a storage location to the units being received.

A picker appears showing locations already storing that item at the top, and all available locations below. Select the location where the units will be stored.
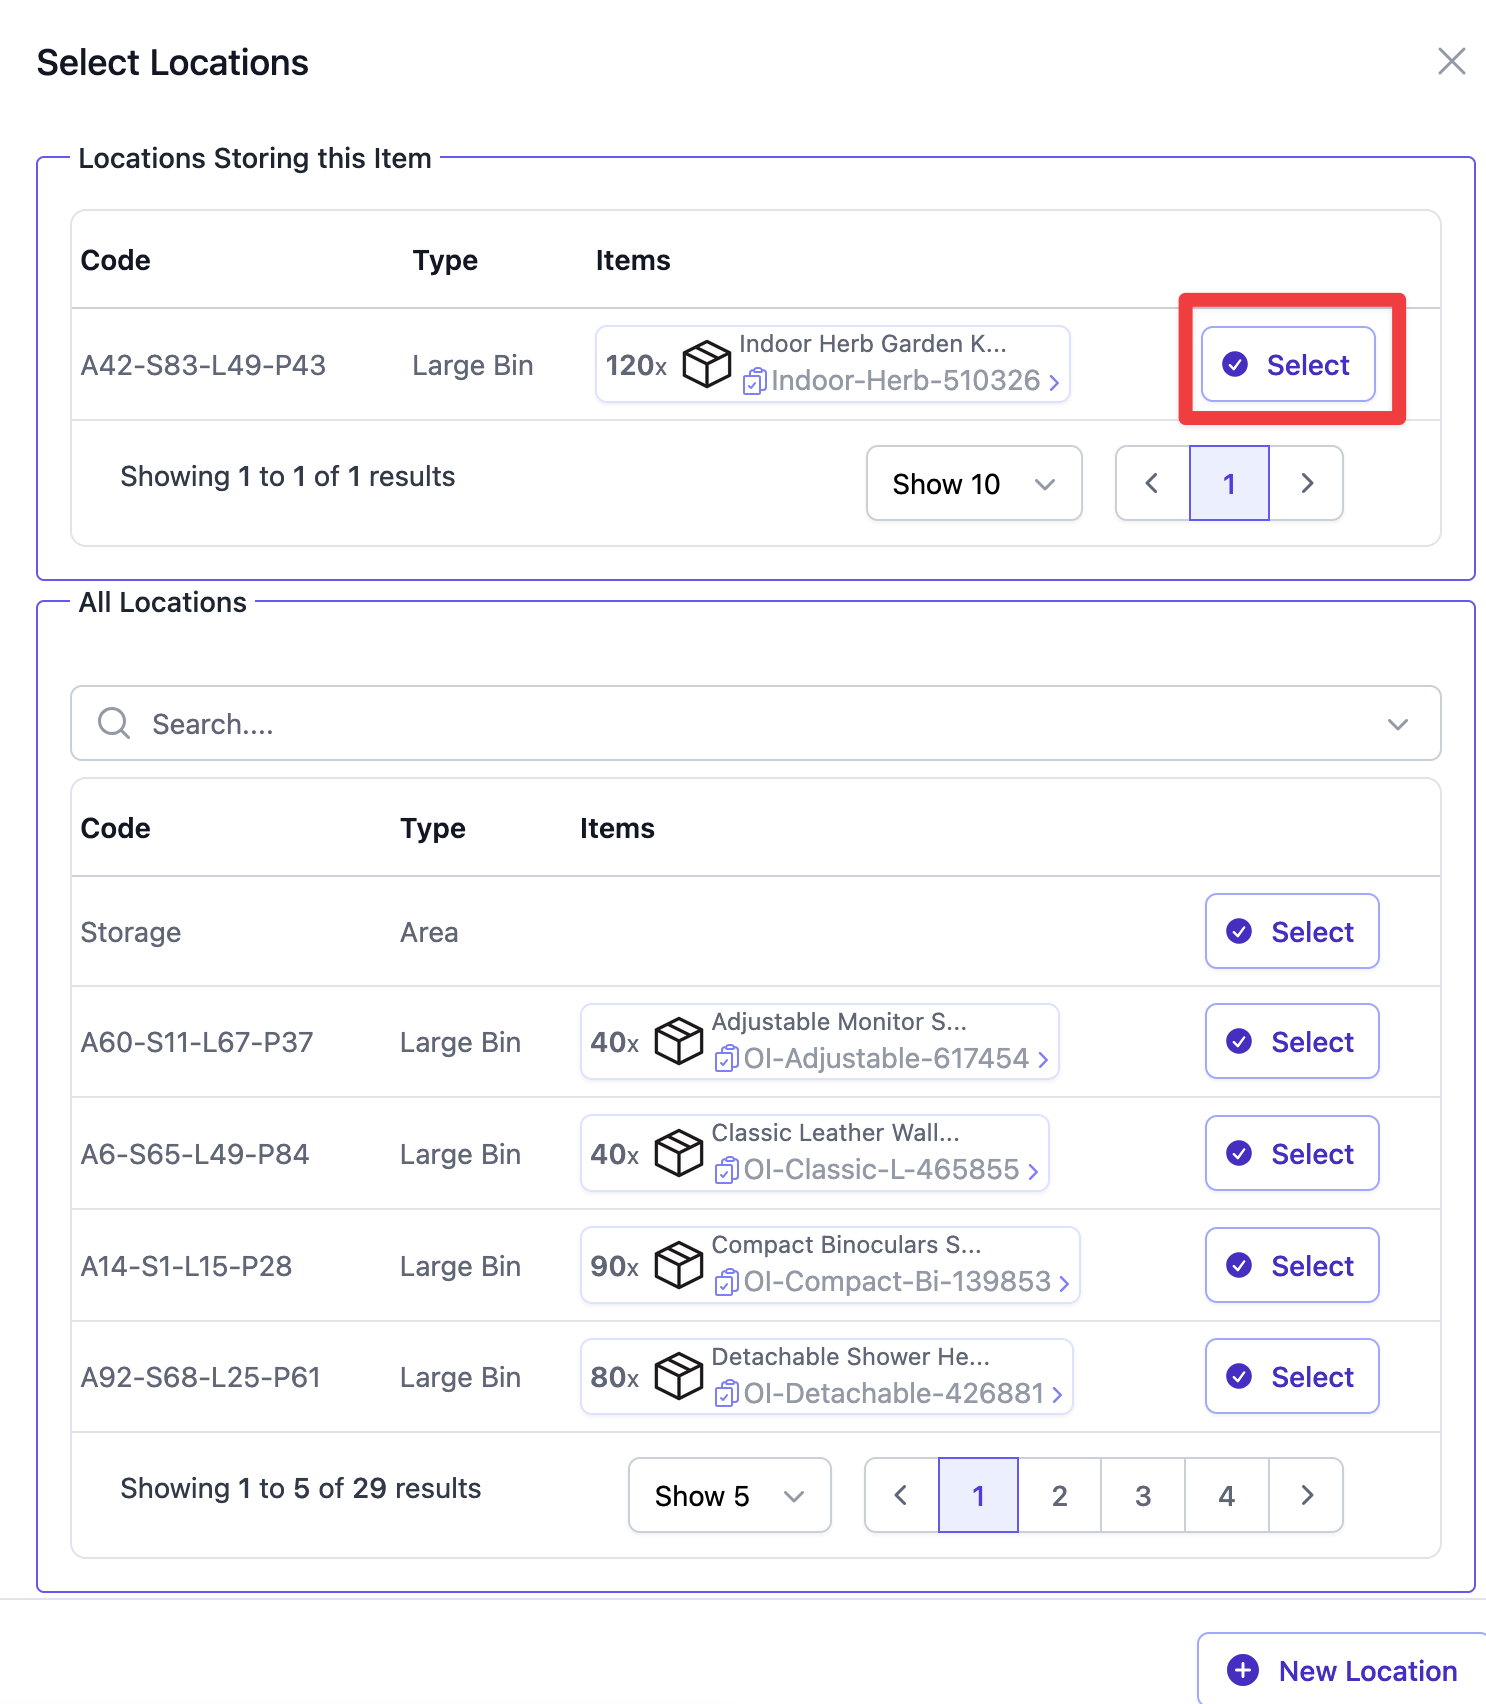
Items can be split across multiple locations by adding multiple lines with different location codes and quantities.

Viewing an Item's Locations
Open any inventory item and select the Locations tab to see all locations storing that item, along with the storage type and quantity at each location.
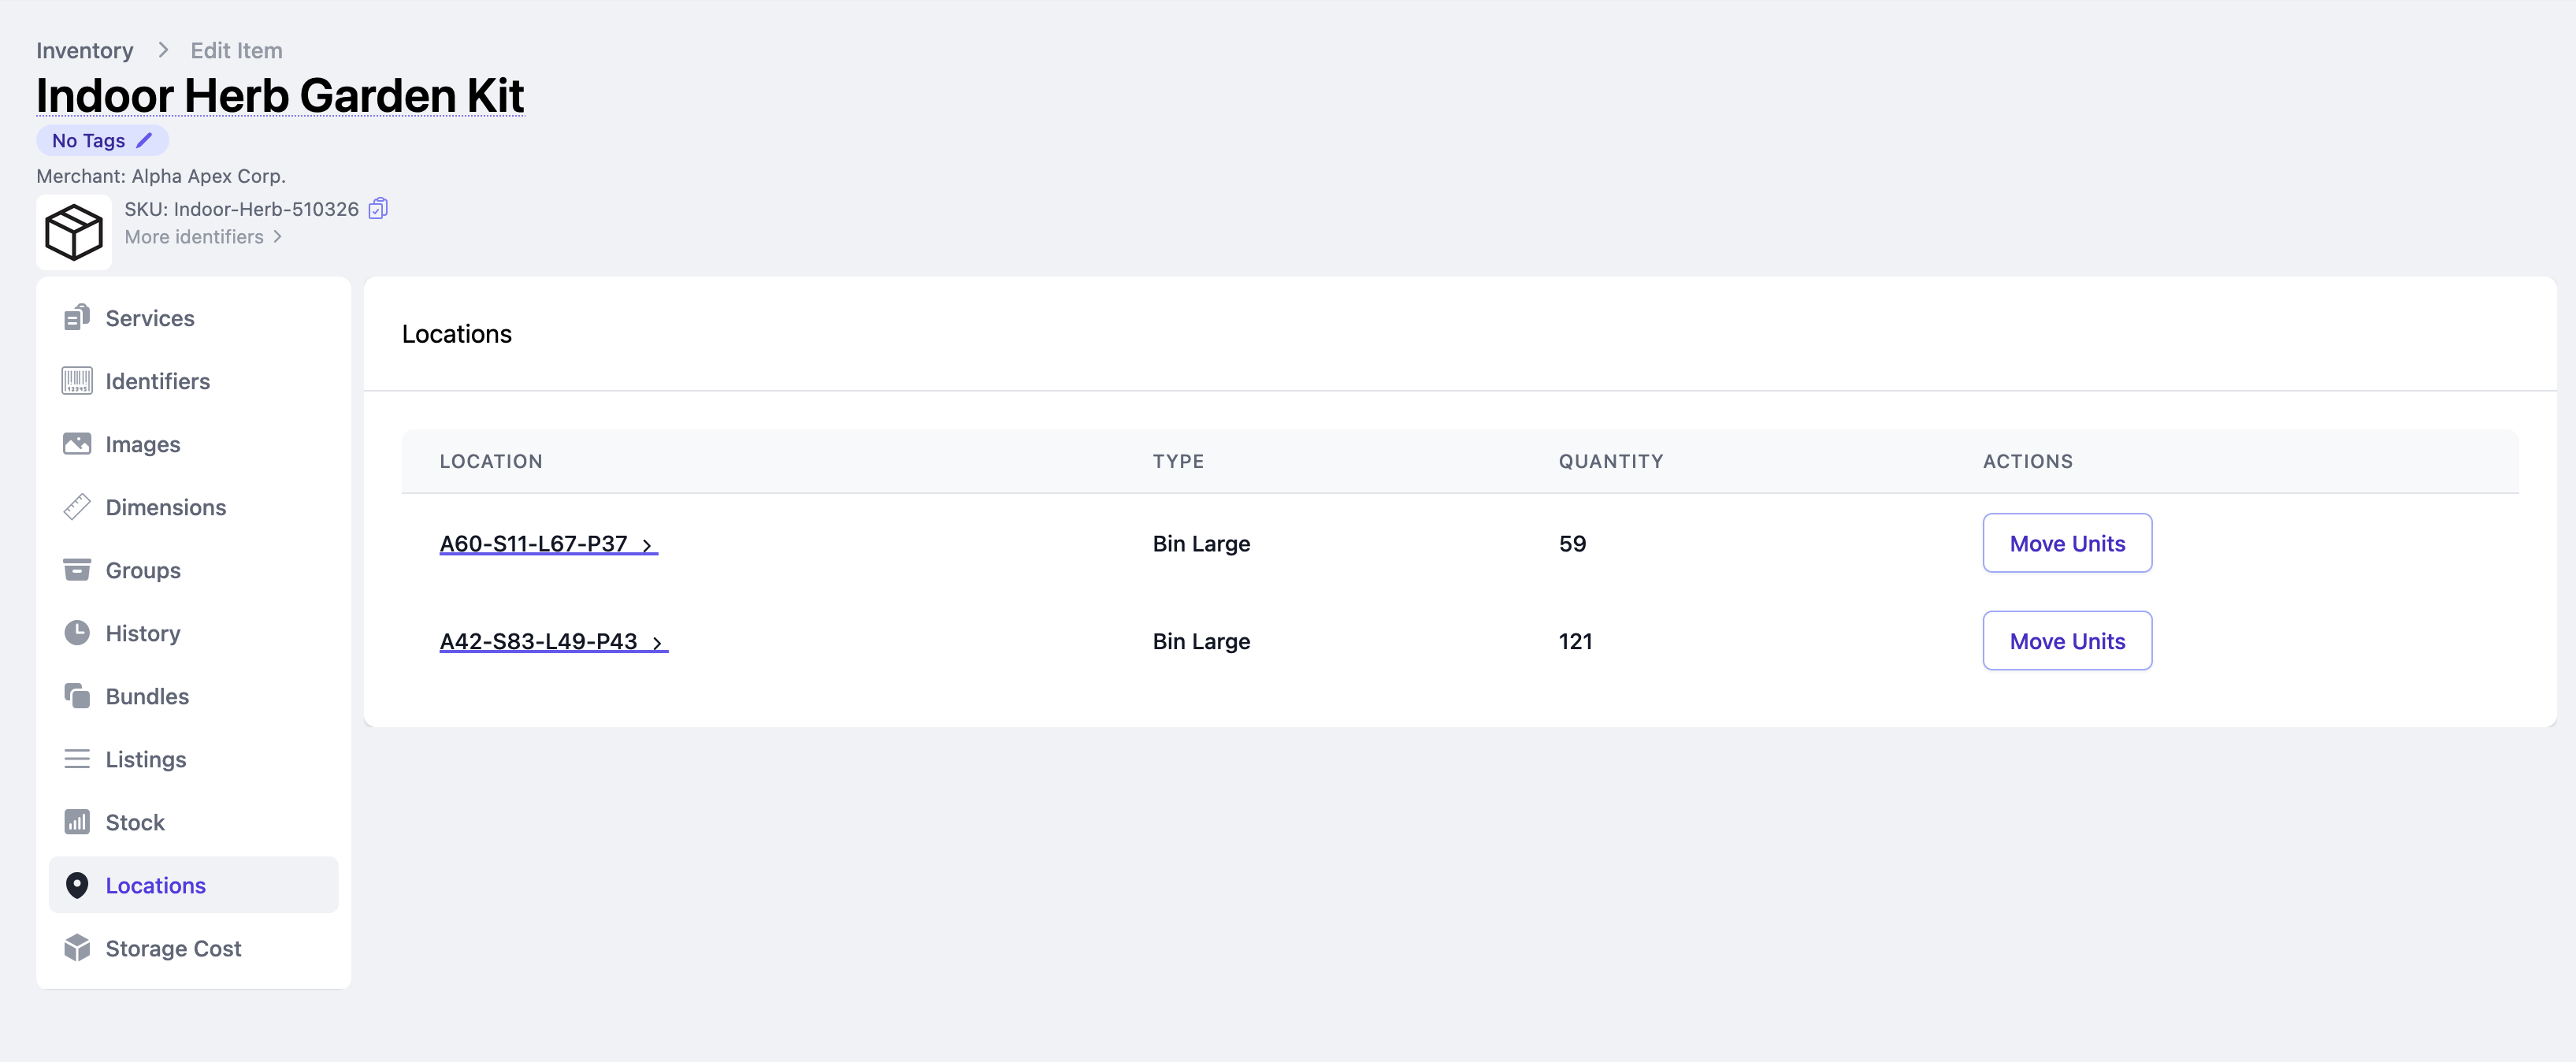
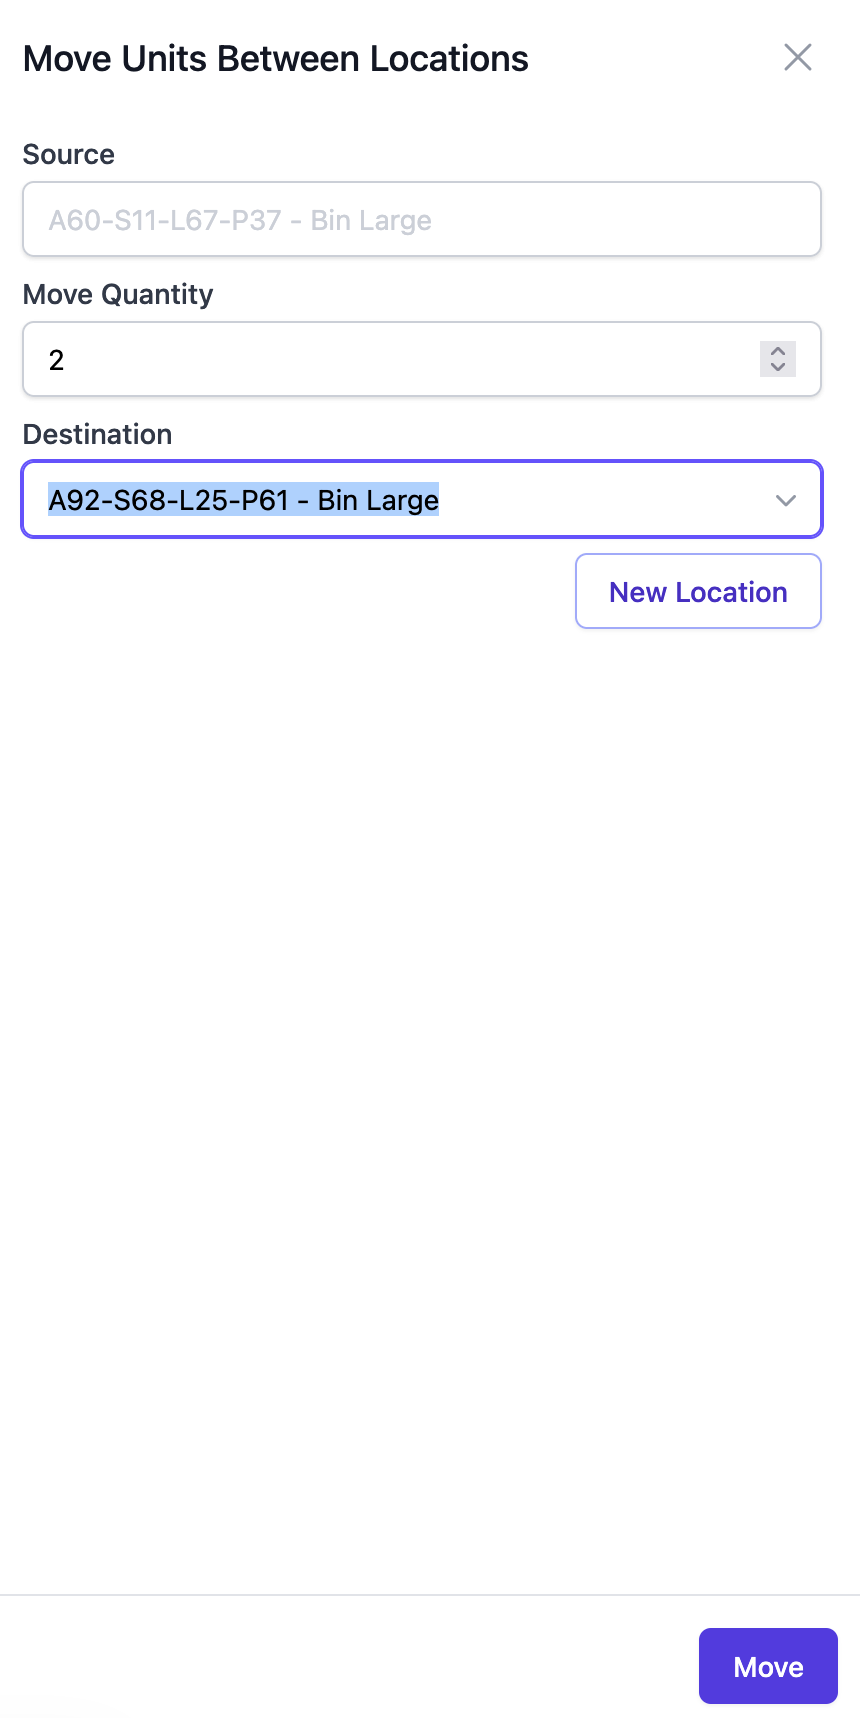
Moving Items Between Locations
From the Locations tab on an inventory item, click Move Units next to a location. Specify the quantity to move and select the destination location, then click Move.