Arrange Transport for Amazon Shipment
Getting Started
To begin the FBA 2024 workflow:
- Navigate to the outbound shipment you want to send to Amazon.
- Click the Arrange Transport button.
- Select Amazon FBA V2024 from the available options.
FBA Item Details (Pre-Workflow)
Before entering the 7-step wizard, configure the FBA item details for your shipment.
FBA Eligibility Check
The system automatically checks each item's eligibility with Amazon's FBA Inbound program and displays a green (eligible), red (not eligible), or loading badge next to each item. If an item is not eligible, a yellow warning panel explains the reason (e.g., not in Amazon catalog, requires hazmat approval, condition not met). These warnings are non-blocking.
EU Destination Marketplace Selection
Sellers connected to an EU Amazon channel can select their destination marketplace. The marketplace defaults to your connected channel but can be changed by clicking Edit on the Ship To card. Available markets include Germany, UK, France, Spain, Italy, Netherlands, Poland, Sweden, Belgium, Turkey, UAE, Saudi Arabia, Egypt, and India.
Configure Item Settings
For each item, configure Label Owner, Prep Owner, Prep Category, Prep Types, and Expiry Date as applicable. Verify the Ship From Address and Seller Information, then click Create Amazon FBA Plan to enter the wizard.
Selecting the Seller Account (For Seller)
The plan is created under one Amazon seller account, shown in the "For Seller" field next to Ship From. If you have more than one Amazon account connected, click Edit on For Seller to choose the correct one before creating the plan. Each Amazon account is a separate catalog with its own listings and FNSKUs, even for the same ASIN.
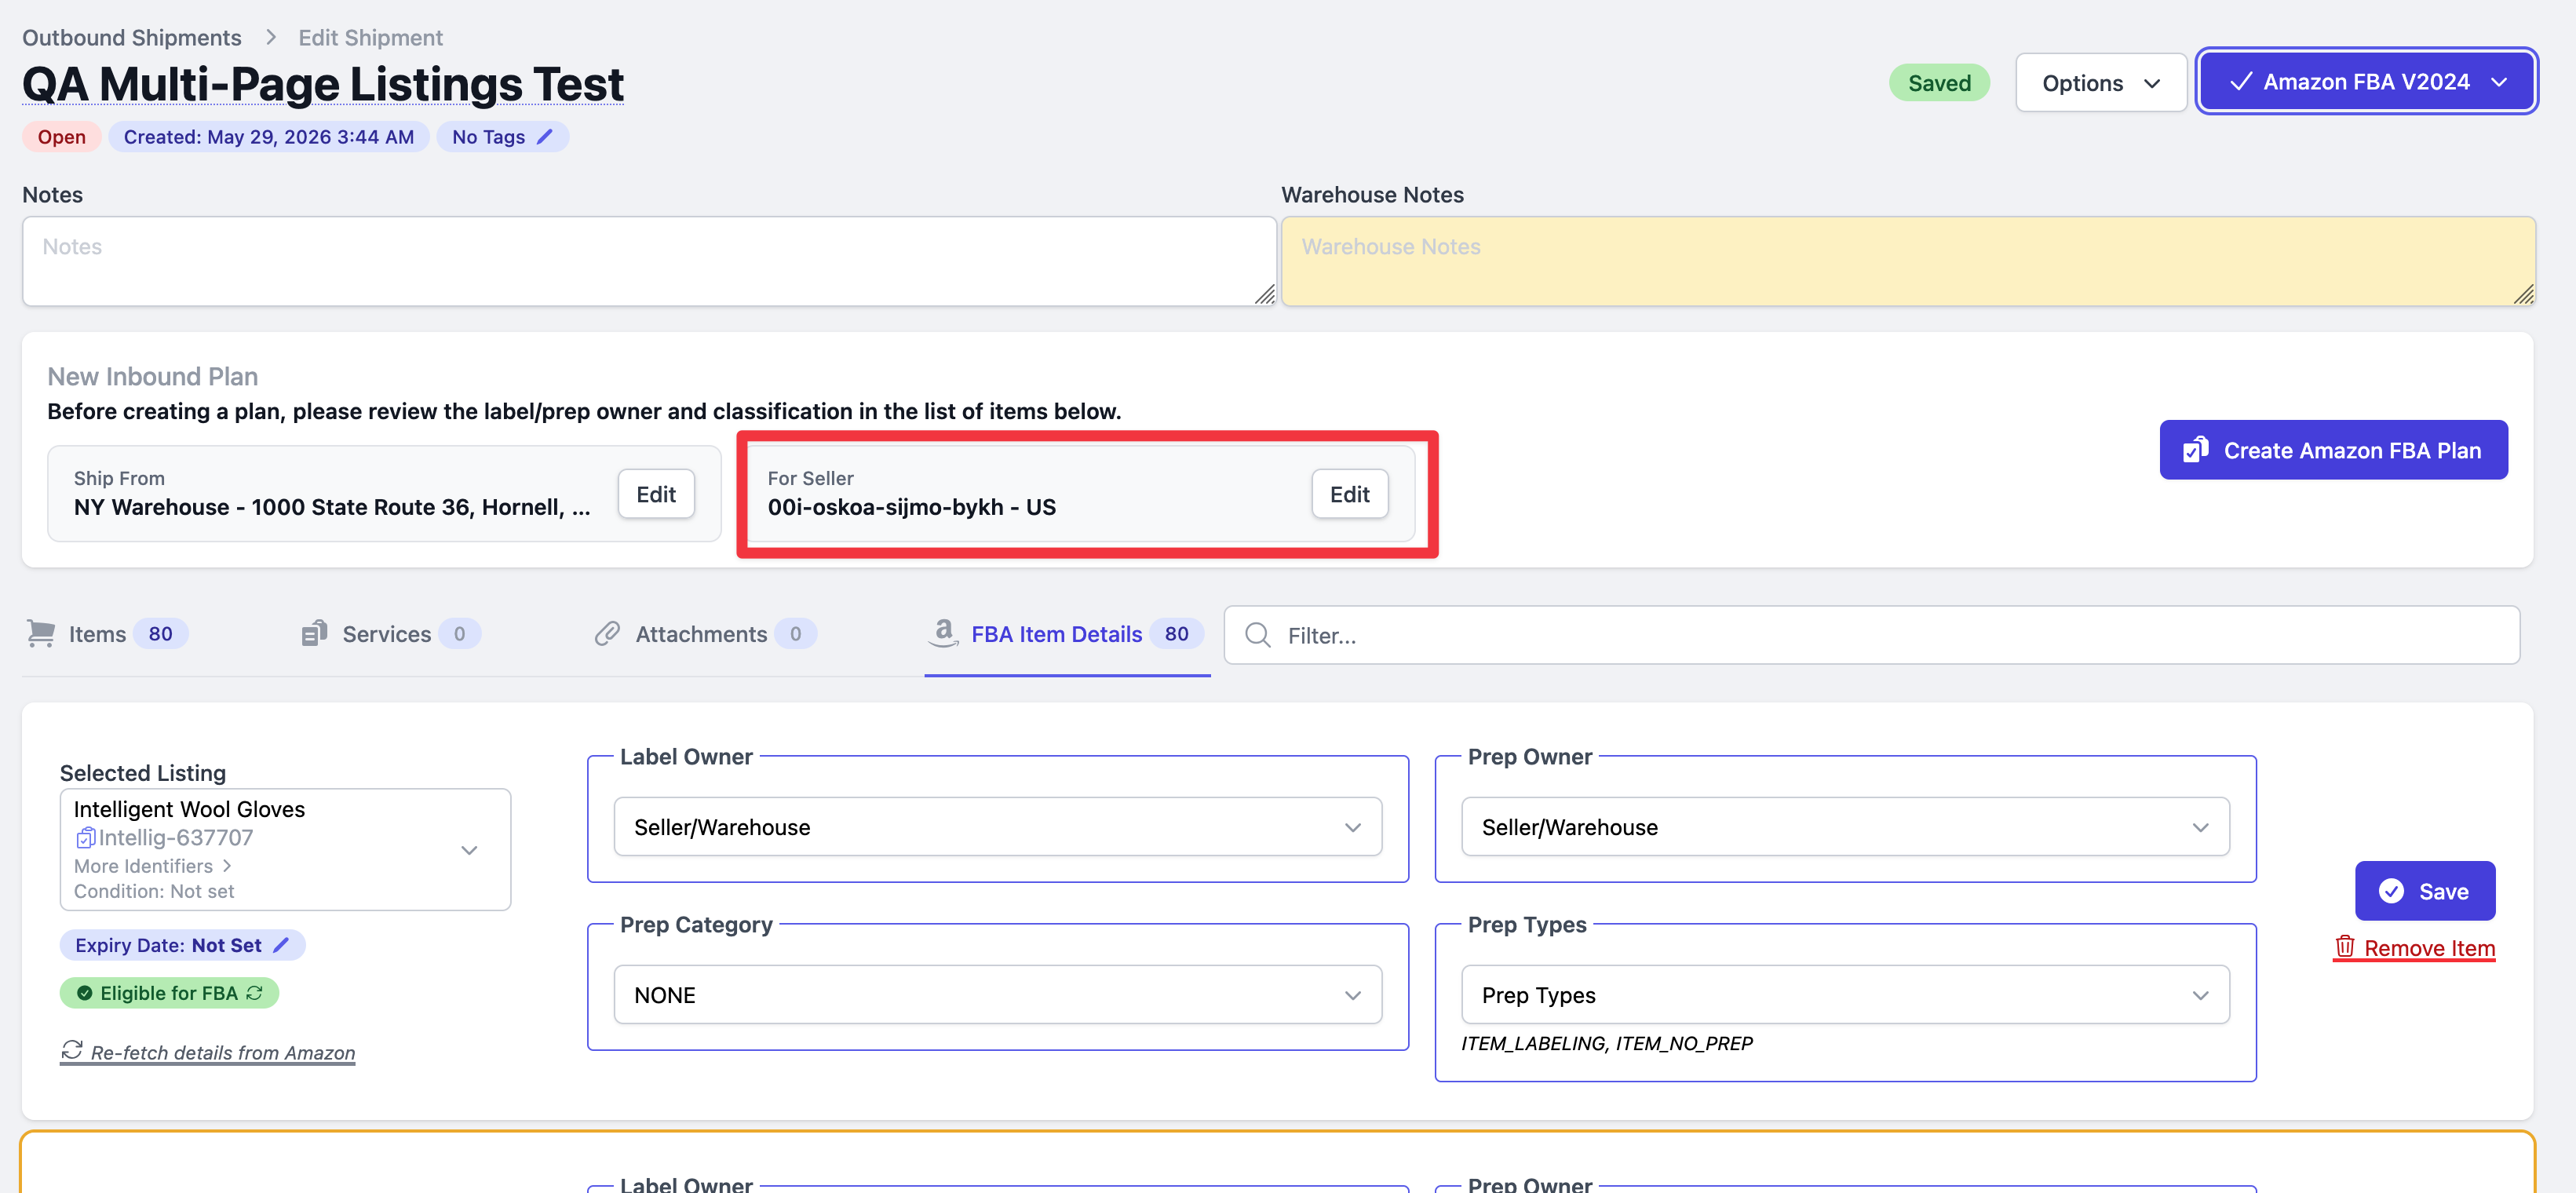
For Seller applies to the entire plan. PrepBusiness looks up each item's listing on the selected account, so an item linked to a listing under a different account shows "No listing found for this item" and "No ASIN - Cannot check eligibility," even though it is listed on Amazon under your other account. Make sure every item in the shipment is linked to a listing on the account set in For Seller. See Linking Items to Listings.
Step 1: Pack Workflow
Pack First
Required for SPD shipments. You enter box contents in Step 3 before seeing placement options. Also supported for LTL, though Pack Later is more reliable for LTL.
Pack Later
Does not support SPD. Amazon provides placement options before you finalize box contents. More reliable for LTL shipments.
Note: Pack Later does not support group configurations (cases & pallets) before splits. If you need to keep cases intact and respect group configurations, use Pack First instead.
Step 2: Packing Options
Review the packing options provided by Amazon. Each option shows Total Fee, Discounts, and Packing Groups (SKU count and total item count). Select the option that best fits your needs.
Step 3: Box Contents
Create boxes and assign items to them. Click Add Box Group, enter dimensions and weight, then use +All or +1 to assign items. Enable Use 2D Barcode or Auto-Print FNSKU Labels as needed.
Qualifying for Amazon-Optimized Placement
To unlock the Amazon-optimized inbound option with no inbound placement fee in Step 4, your box configuration must meet these requirements:
- At least 5 identical cartons or pallets per item
- Same quantity per item across all cartons
- Same item mix in every carton
If any carton has a different quantity or is missing an item that others include, the plan will not qualify. Once all items are assigned to boxes, click Submit Box Contents to proceed.
Printing Box Labels While Packing (Pack Later)
In the Pack Later workflow, you can print box labels for each box group directly from the Box Contents step, before you enter pallet weight and dimensions or confirm transportation. This lets you label each box as you pack it and then build the pallet, instead of finishing the shipment and breaking the pallet down afterward to apply labels.
This option is only available when Use 2D Barcodes is enabled on the Box Contents step. Amazon's 2D barcode box labels encode the box contents and do not depend on Amazon assigning box IDs later in the workflow, so they can be generated during packing. In the Pack First workflow, box labels are only available on the final Labels step after a placement option is confirmed.
To print box labels while packing:
- In Step 1, select the Pack Later workflow.
- On the Box Contents step, enable Use 2D Barcodes.
- Add your box groups and enter the box quantity for each group. Once a group's boxes are created, a Print Box Labels button appears on that group's row.
- Print the labels and apply them to each box as you pack, then build the pallet.
Step 4: Placement Options
Review Amazon's placement options based on fulfillment center locations, associated fees, and shipping efficiency.
Amazon-Optimized Inbound Option
If your box contents meet the eligibility requirements from Step 3, Amazon will offer an Amazon-optimized inbound option with no inbound placement fee. This option distributes inventory across multiple fulfillment centers for better placement.
Eligibility: at least 5 identical cartons per item, same quantity per item, and same item mix in every carton.
Review each option's destination fulfillment center(s) and associated costs. Select the placement option that best fits your needs and budget.
Step 5: Delivery Options
- Delivery Window: Select your preferred delivery date range
- Delivery Speed: Choose delivery speed options if available
- Destination Details: Confirm the fulfillment center address
Step 6: Transportation Options
Select your shipping method:
- Small Parcel Delivery (SPD): For individual boxes via parcel carriers
- Less Than Truckload (LTL): For palletized shipments sharing truck space
- Full Truckload (FTL): For large shipments requiring a full truck
Select your preferred carrier or use Amazon's partnered carriers for potentially discounted rates. Review estimated shipping costs before confirming.
Step 7: Labels
Generate and download all required shipping labels. Depending on your shipment type:
- Box Labels: Labels for each carton
- Pallet Labels: For LTL/FTL palletized shipments
- Bill of Lading: Required for LTL/FTL shipments
Click the download button to generate labels in PDF format, then print and apply to boxes/pallets. If you have a print station configured, labels may print automatically.
Why UPS Label Weights May Be Higher Than Box Weights
Amazon partnered carriers may show dimensional weight on the UPS carrier label when dimensional weight is higher than the actual box weight entered in PrepBusiness.
Dimensional weight is based on the box size. For example, a 33 x 15 x 25 inch box has a dimensional weight of about 64 lb using Amazon's partnered-carrier calculation, even if the physical box weighs about 35 lb.
In this case, the Amazon FBA carton label may show the actual submitted weight, while the UPS carrier label shows the higher dimensional weight. This does not mean PrepBusiness submitted the wrong weight.
To reduce the billed UPS weight, use smaller boxes when possible or pack boxes closer to their dimensional weight.
Completing the Shipment
After completing all 7 steps, your shipment is automatically marked as shipped when you confirm the transportation option. Apply all labels and arrange for carrier pickup or drop-off.
Amazon Warehousing & Distribution (AWD)
PrepBusiness does not support Amazon Warehousing & Distribution (AWD) natively. Amazon FBA V2024 is the only Amazon destination type available when you arrange transport, so AWD inbound orders cannot be created or confirmed from PrepBusiness, and AWD box labels cannot be pulled into the app.
Amazon's AWD API is still available only in the US marketplace. Even once support is built, there will be nothing to call for the EU and UK marketplaces until Amazon opens the API there.
Handling AWD Volume in the Meantime
You can still run AWD volume through PrepBusiness as a manual outbound shipment so inventory and billing stay accurate. Create the AWD order in Seller Central, then:
- Create the outbound shipment and add the items.
- Open the Attachments tab and upload the AWD box labels you generated in Seller Central.
- Select Options, then Mark as Closed. This removes the items from inventory and marks the shipment as sent.
For the full walkthrough of the manual outbound process, see Simple Order Fulfillment Using Outbound Shipments. To follow or vote on native AWD support, see the AWD shipping plans feature request.