Expiry Dates for Outbound Shipments
You can add expiry dates to any or all items on an outbound shipment. This is a two step process:
1. Enable Expiry Dates
To be able to add expiry dates to your items you first have to enable them in your account settings.
- Navigate to your Account Settings page.
- Scroll to the “View Configuration” section of the page and activate the toggle labeled “Use Expiry Dates on Item Labels”.
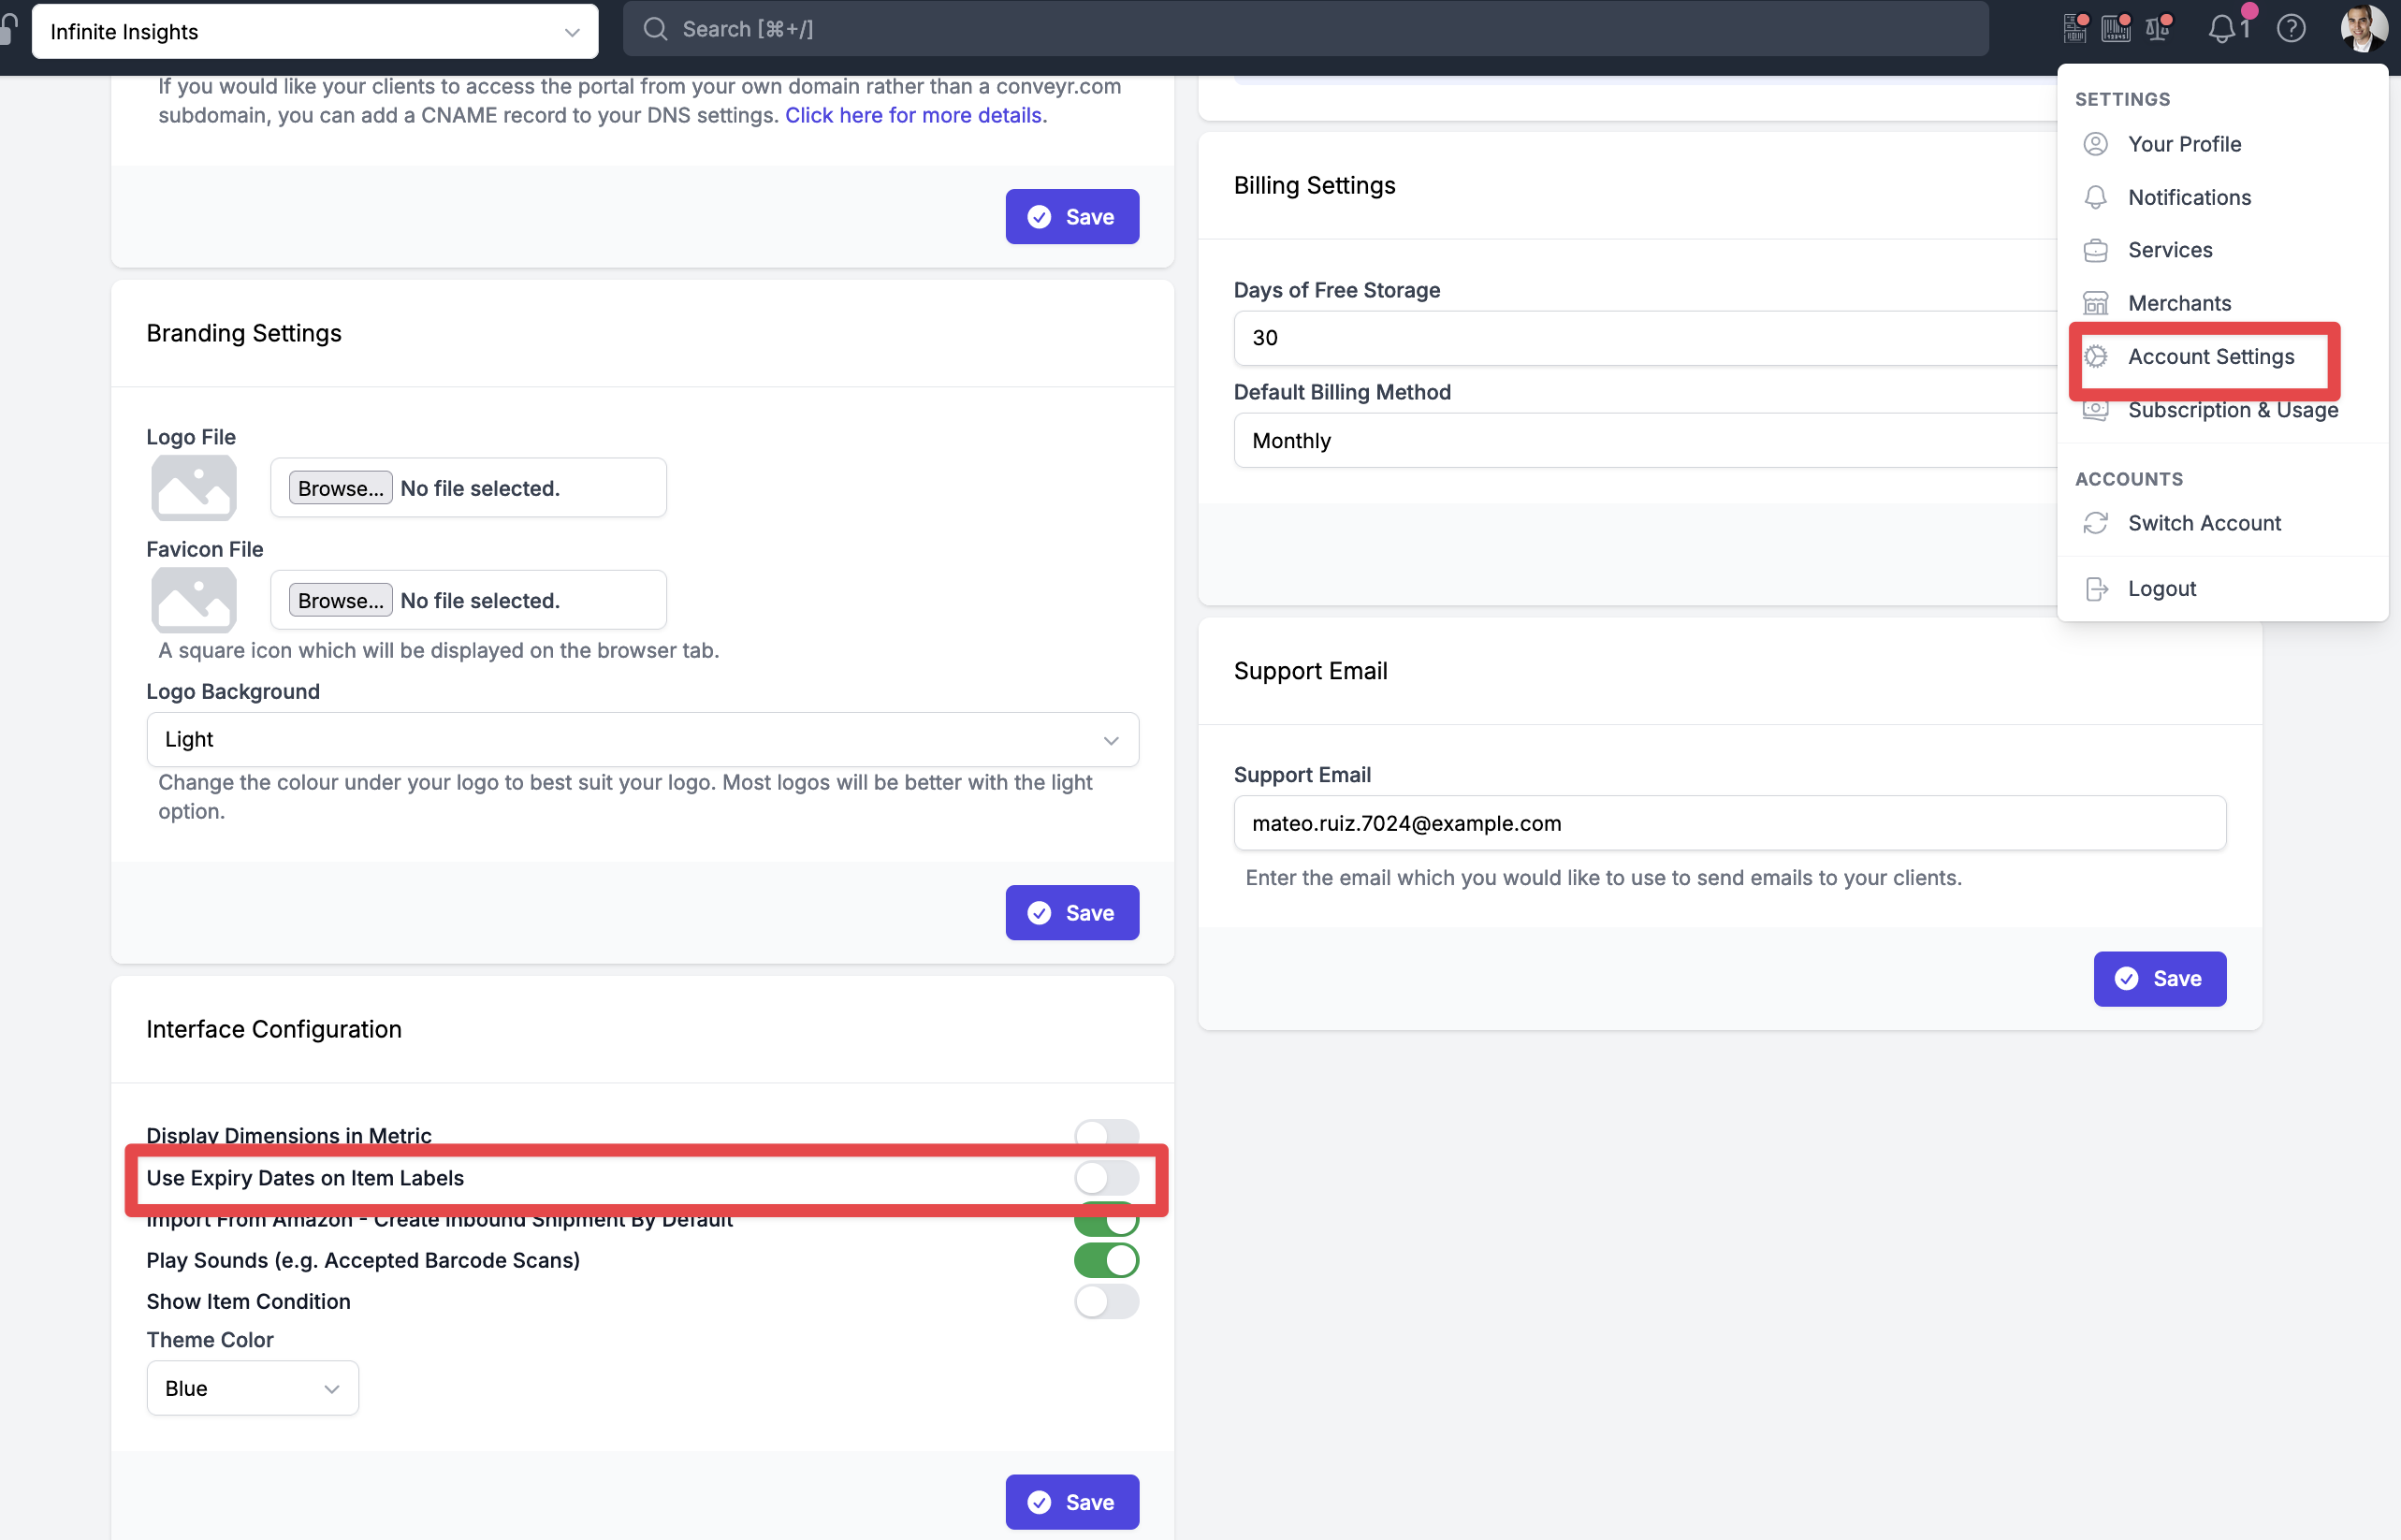
- Select “Save” to save the change
2. Add Expiry Dates to Shipment
After enabling expiry dates you can add them to any item in an outbound shipment. Note that expiry dates are not currently supported on inbound shipments.
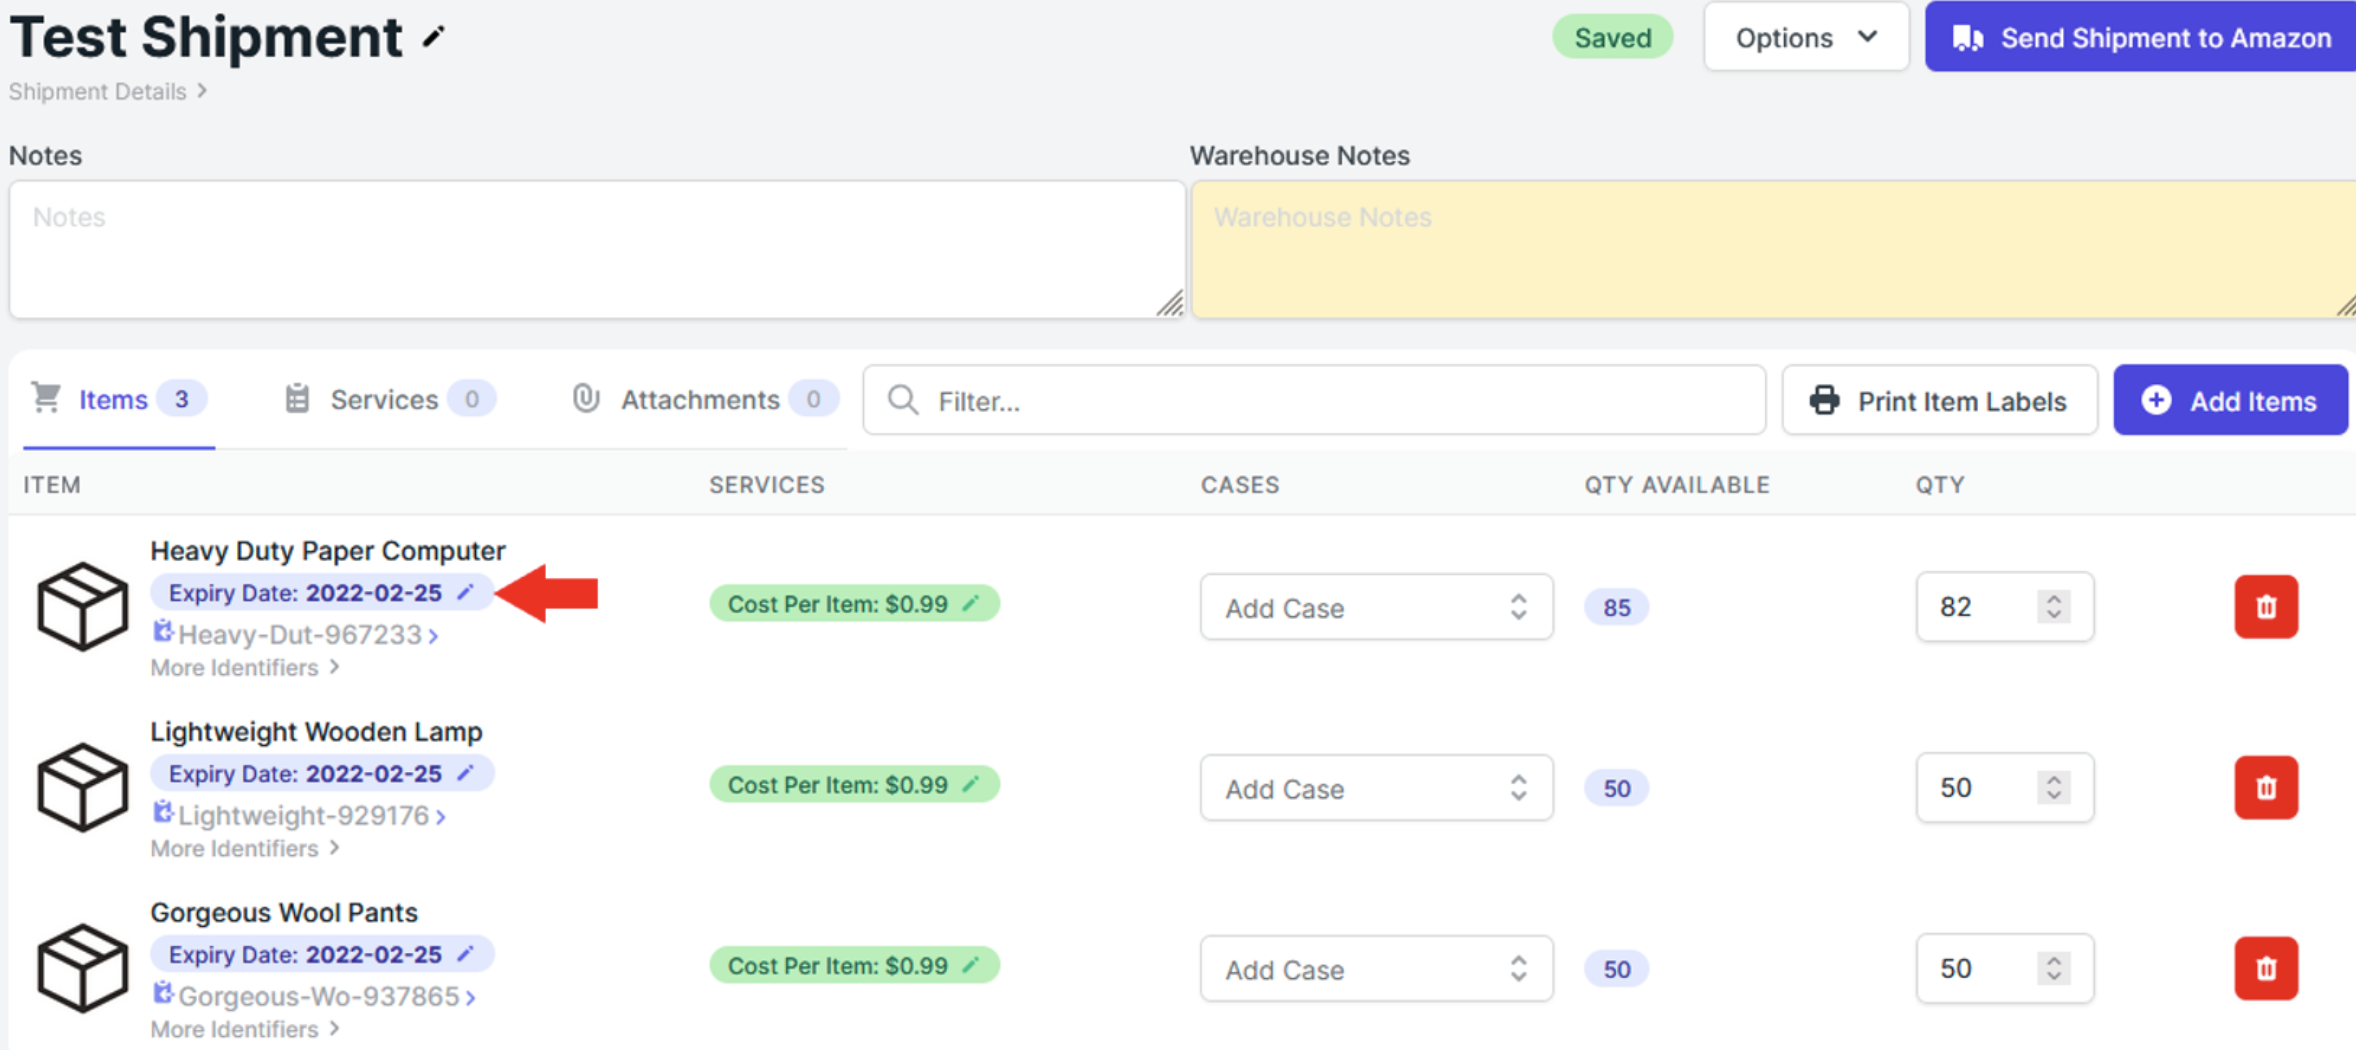
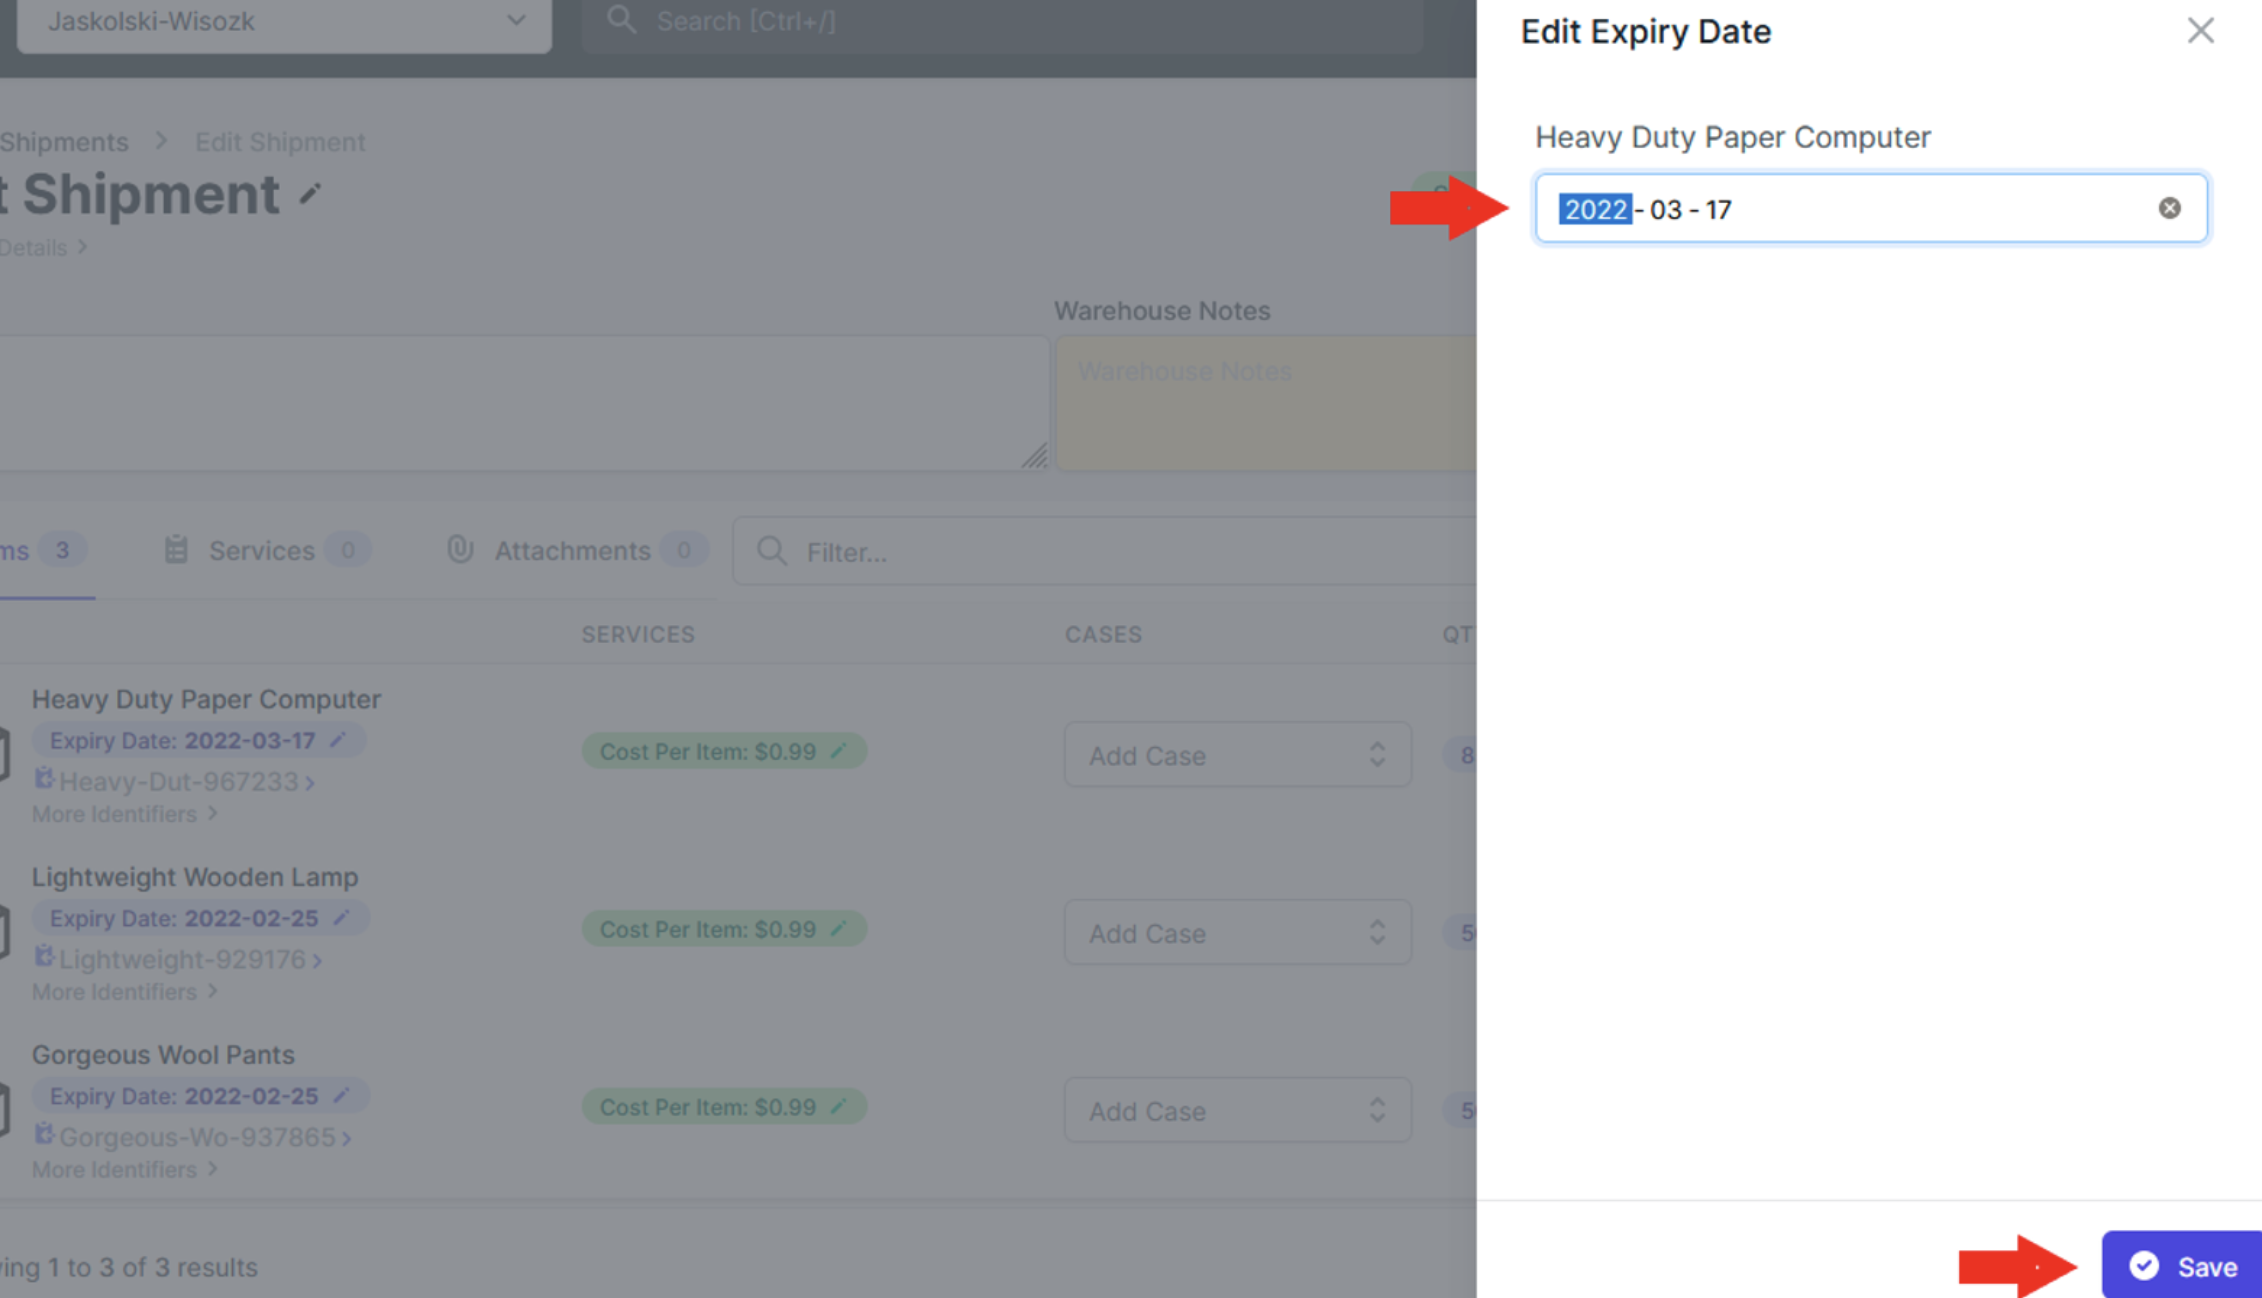
Update a Single Expiry Date
If you want to change a specific item’s expiry date follow these steps:
- Open the Amazon shipment you want to update expiry dates for.
- Select the little pen beside the Expiry Date label on the desired item. When you do this the Expiry Date will either be “Not Set” or have an existing expiry date.
- Set the new expiry date and “Save”.
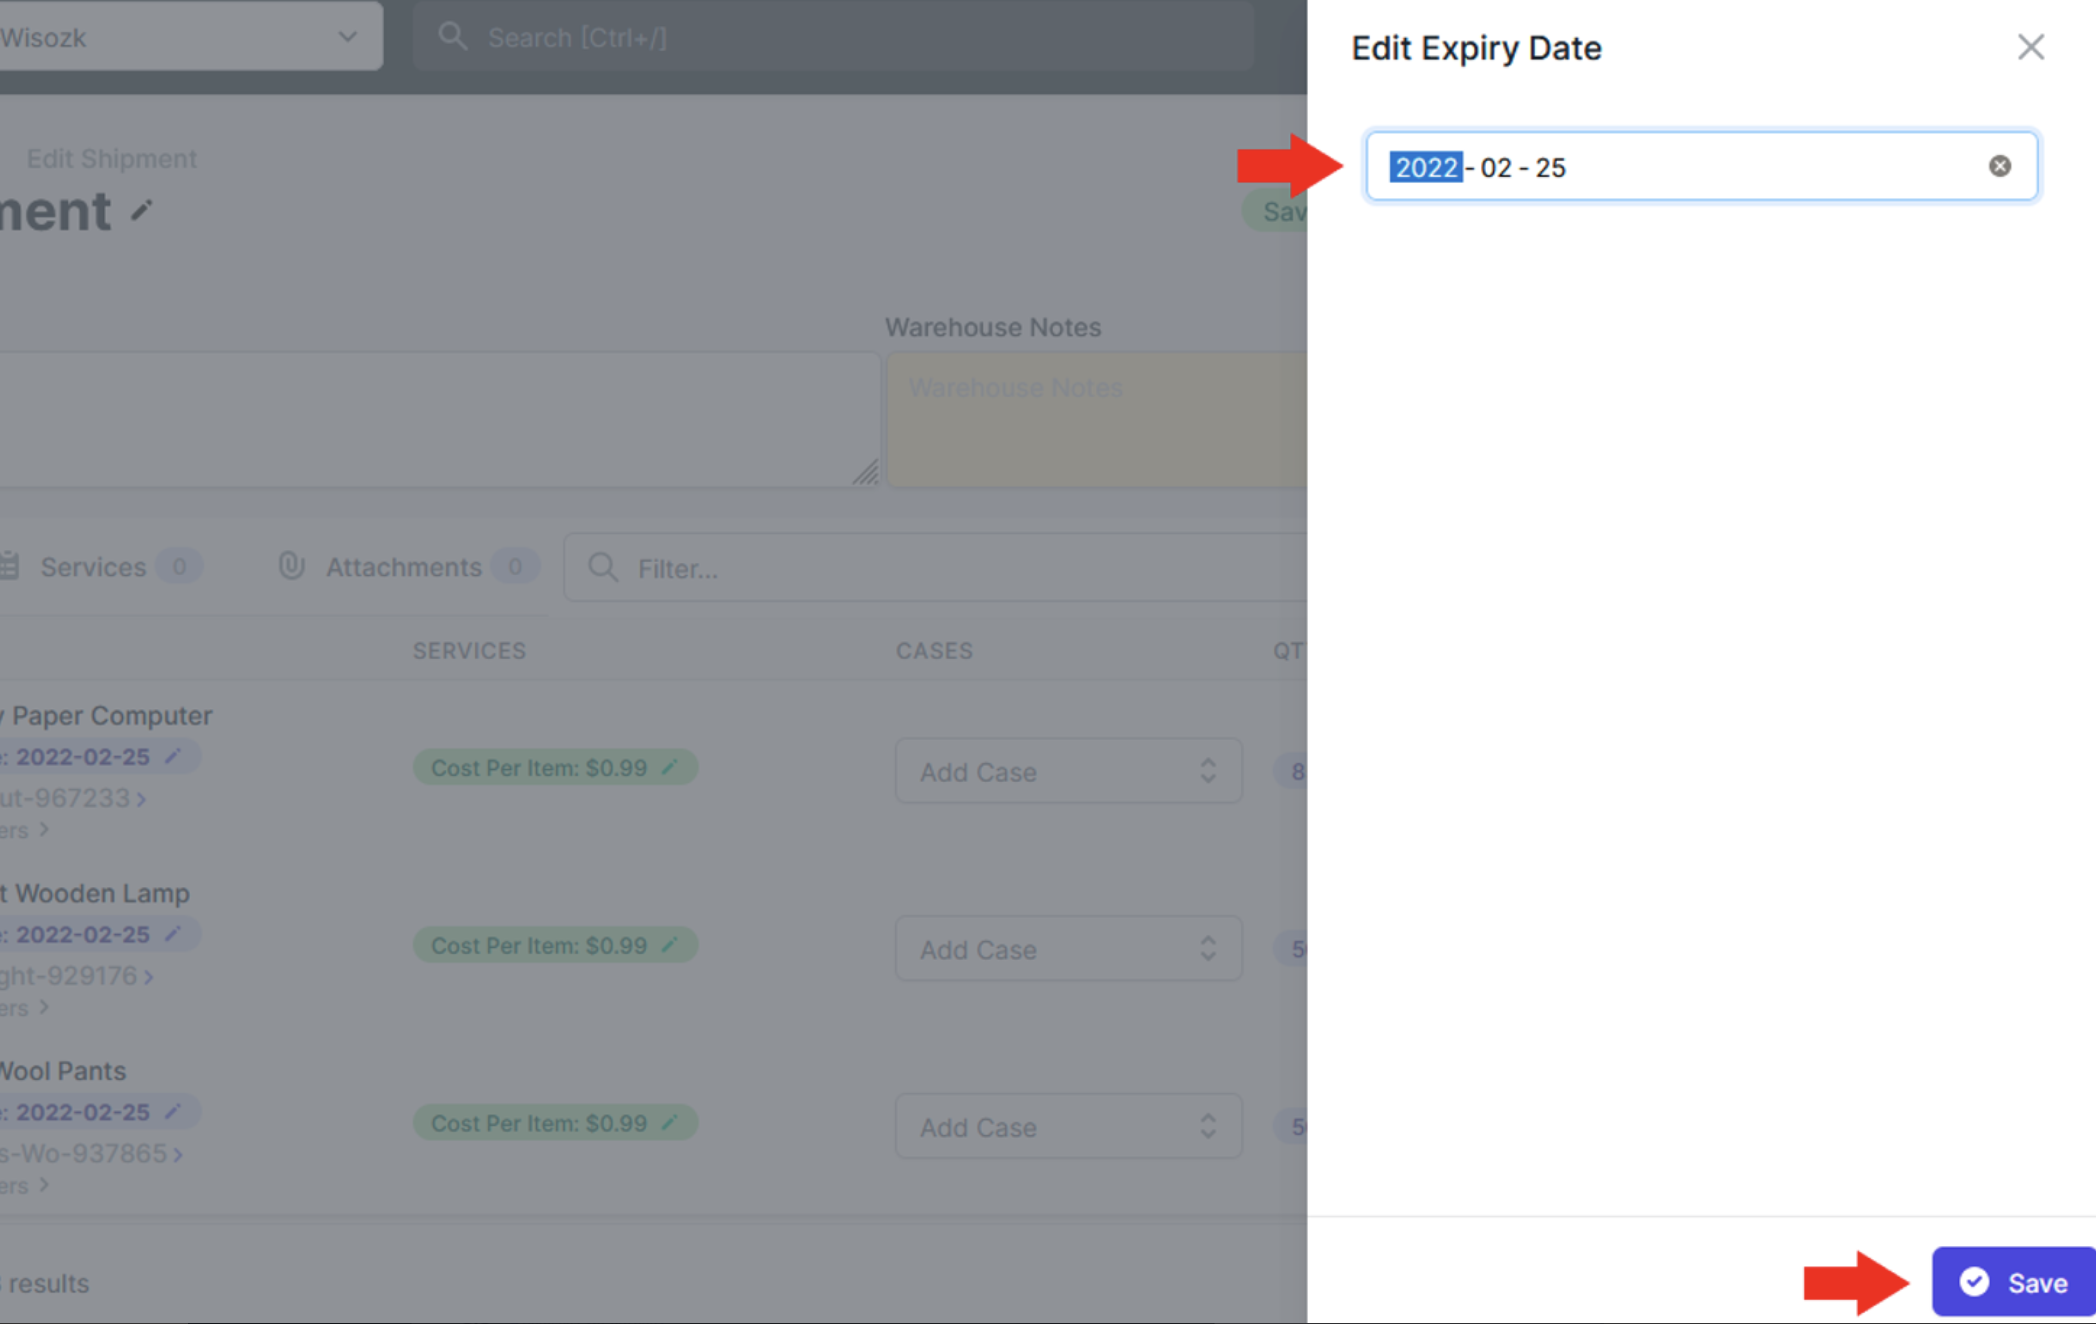
Update all Expiry Dates
You can also add the same expiry date to all the items in any Amazon shipment. To do this follow these steps:
- Open the Amazon shipment you want to update expiry dates for.
- Select the “Options” drop-down box and choose “Update All Expiry Dates”.
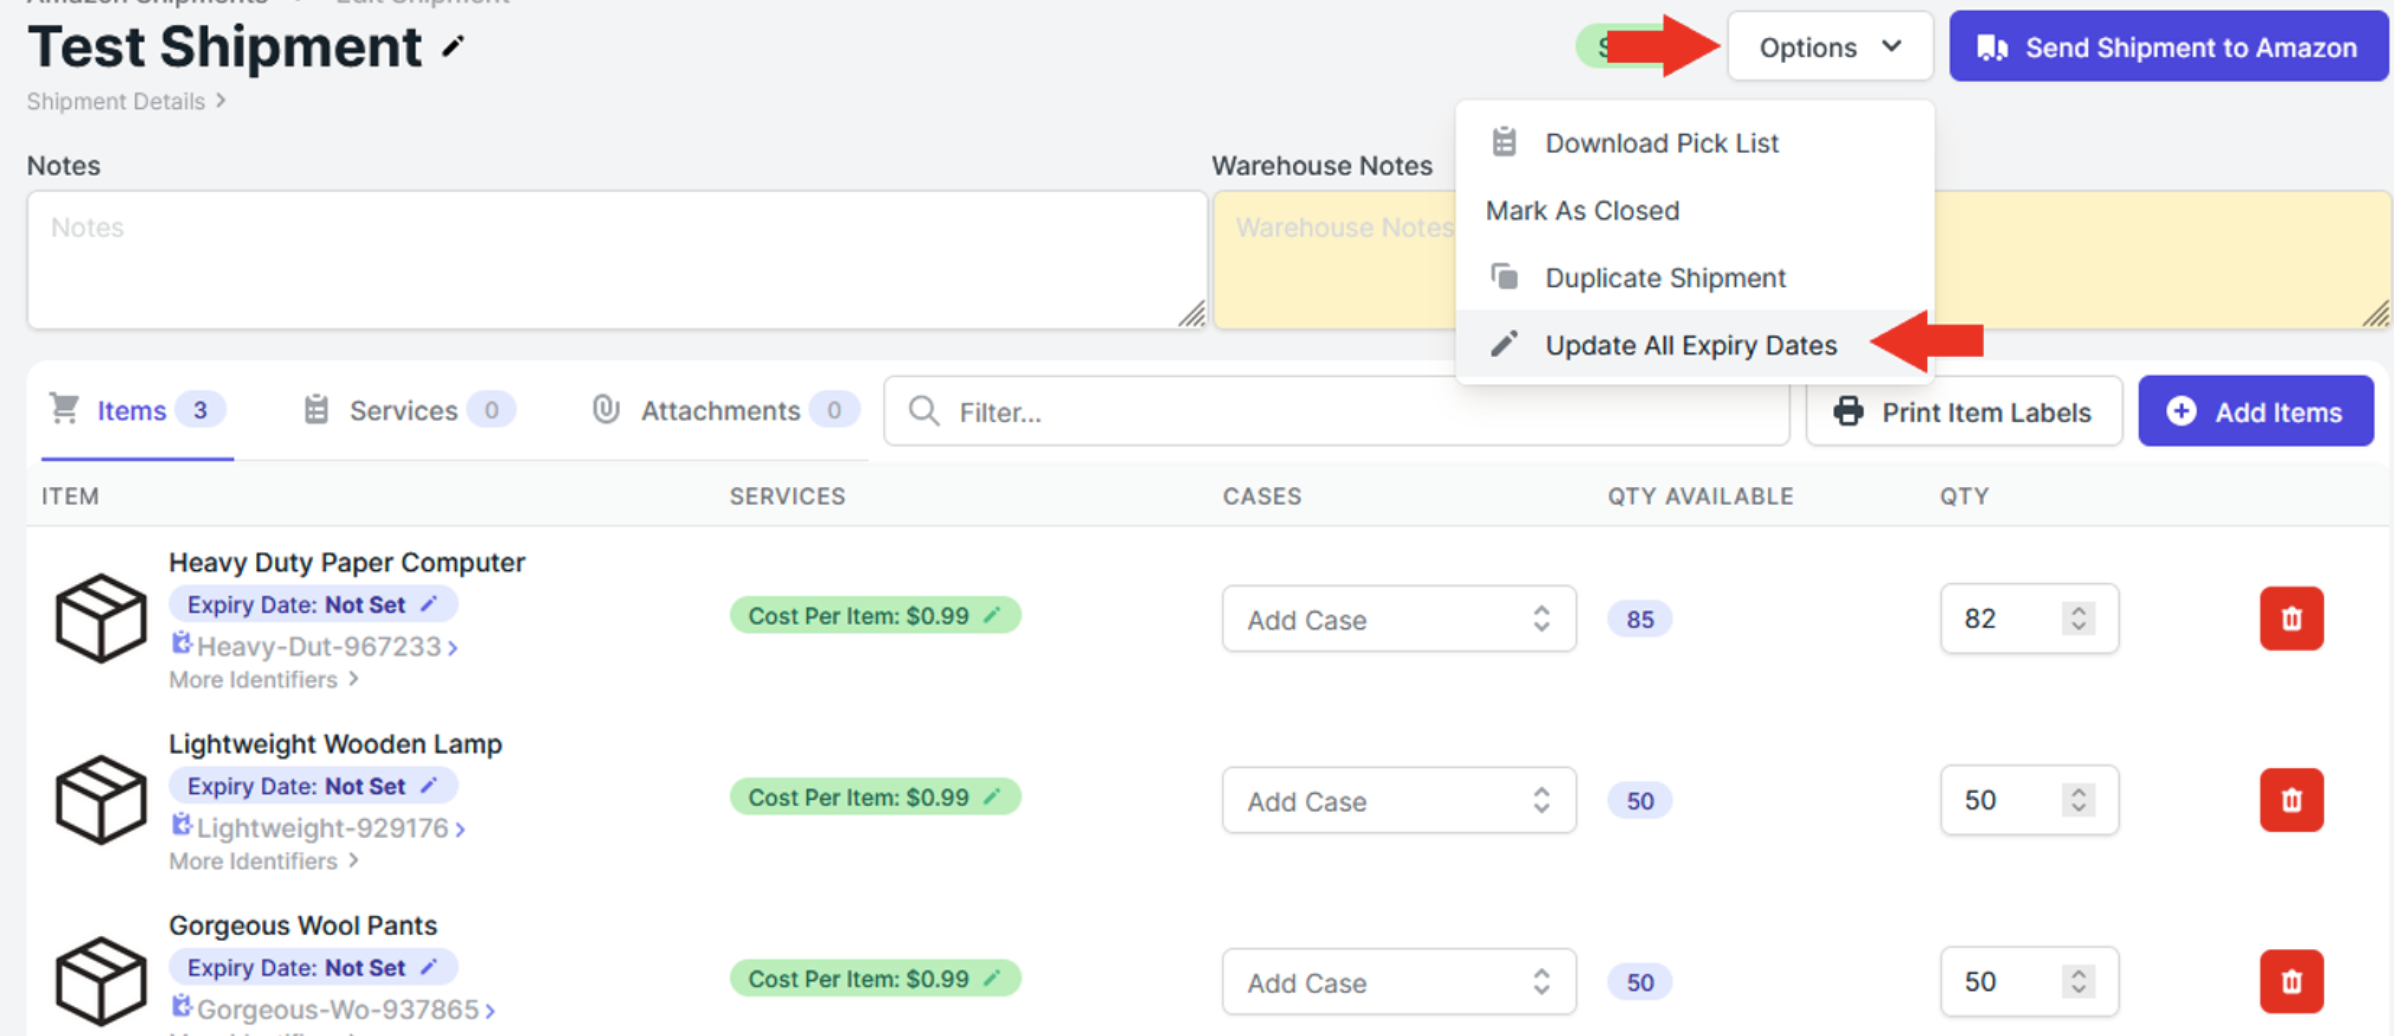
- Set the new expiry date and “Save”.