Creating an Inbound Shipment
Both you and your client have the ability to create inbound shipments which ship from your client to your warehouse. There are three ways to create these shipments:
1. Create a shipment from scratch
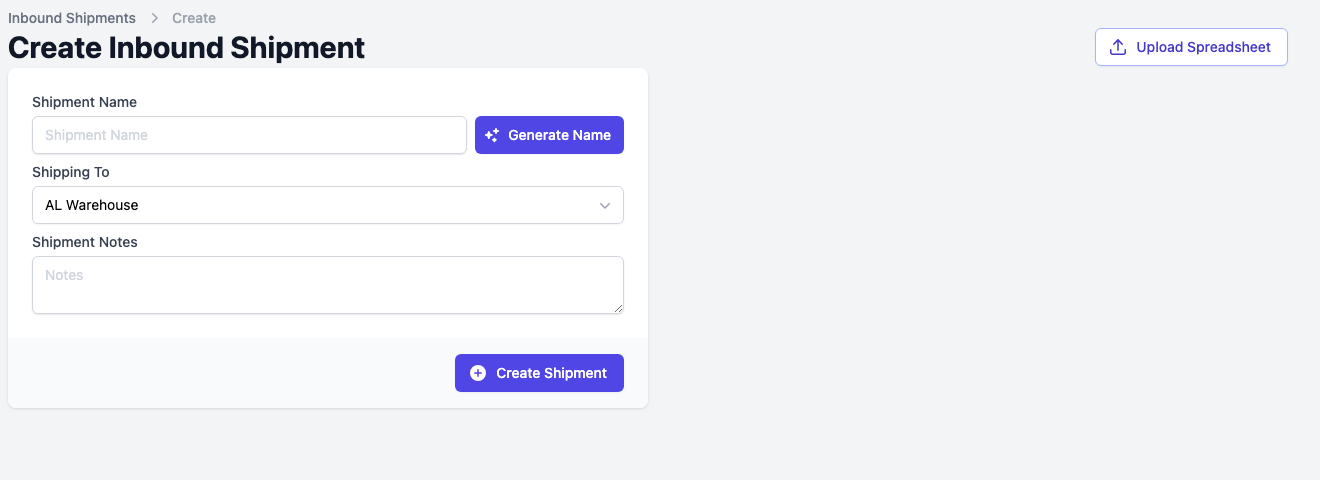
The main way to create an inbound shipment is to create it from scratch. To do this open the Inbound Shipments page and select the “New Shipment” button in the top right corner.

You will then have to name your shipment and specify what warehouse the shipment is being sent to. To finish, select "Create Shipment". This will create a new and empty inbound shipment. If you would rather build the shipment from a file, use "Upload Spreadsheet" on the same page.
2. Import a Plan from Amazon
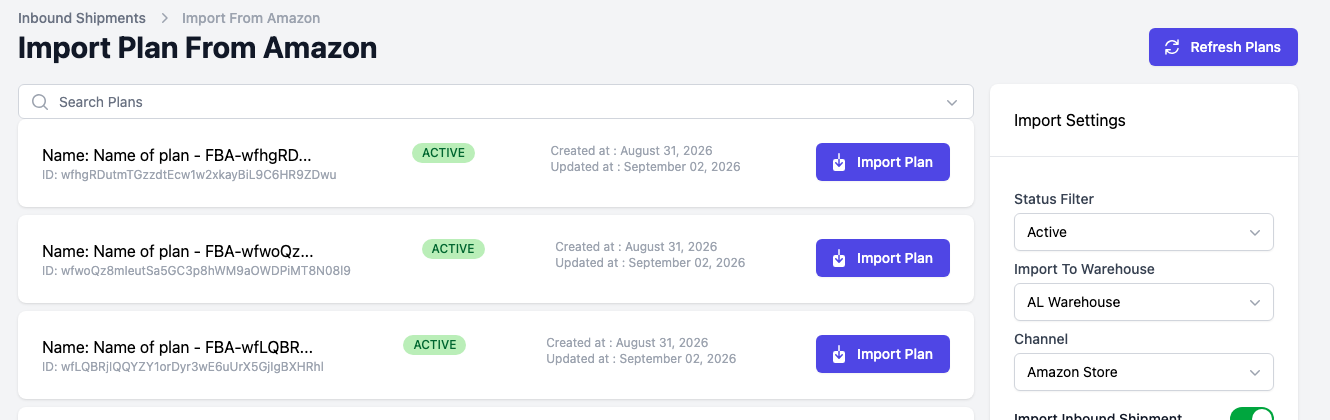
If your client has created an inbound plan in Amazon Seller Central, you can import it instead of building the shipment by hand. The plan is already registered with Amazon, so importing it creates an outbound shipment on your portal along with an optional inbound shipment. The plans come from the merchant’s connected Amazon channel, so select the merchant first. To import a plan, follow these steps:
- On the Inbound Shipments page select the “Import Amazon Shipments” button in the top right corner.
- The page lists the plans on that merchant’s Amazon channel. Use the "Search Plans" box above the list to find one by name or inbound plan ID. In the Import Settings sidebar you can set the Status Filter, the warehouse to import to, the channel, and whether an inbound shipment is created alongside the outbound one.
- Once the settings are to your liking, select the "Import Plan" button on the plan you want.