Edit Inventory Services
There are several edits you can make to Inventory Items.
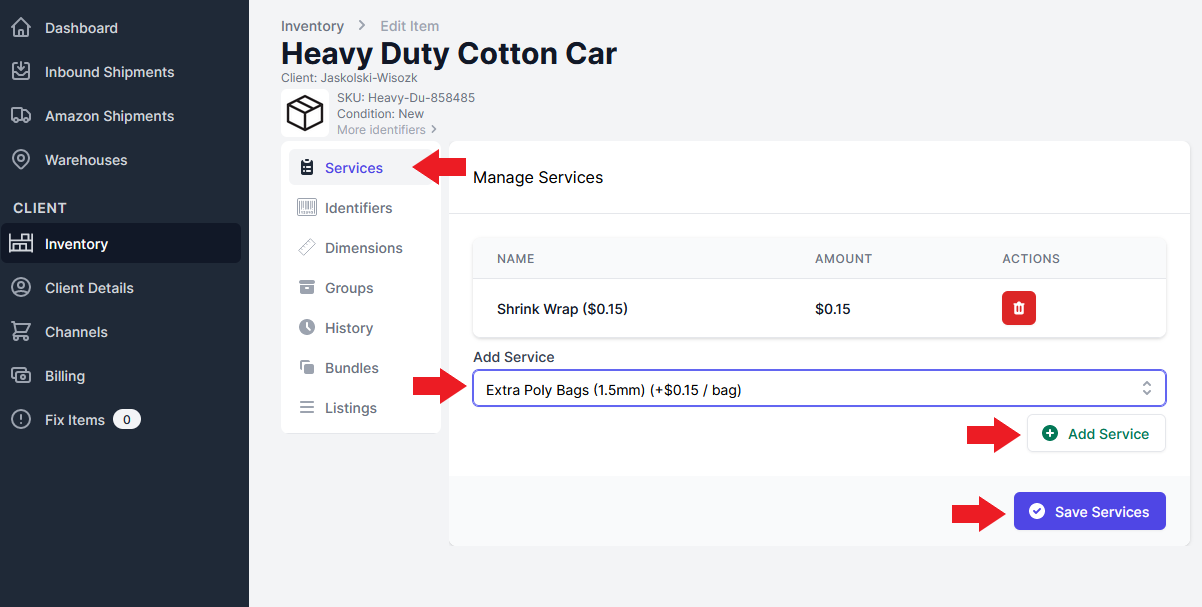
Services
Your clients may desire extra services for some of their inventory items. A fragile item, for example, my require bubble wrap to protect it through transportation. Some other examples of services include extra poly bags and shrink wrap. (Read more about customizing these services here.) To add a service to an item follow this process:
- Select the item of Inventory you want to add services to.
- Select the Services page.
- Click on the “Add Service” drop-down box and select the service you want to add.
- Select “Add Service”.
- Once you have added all the services you want, select “Save Services” to save your changes.
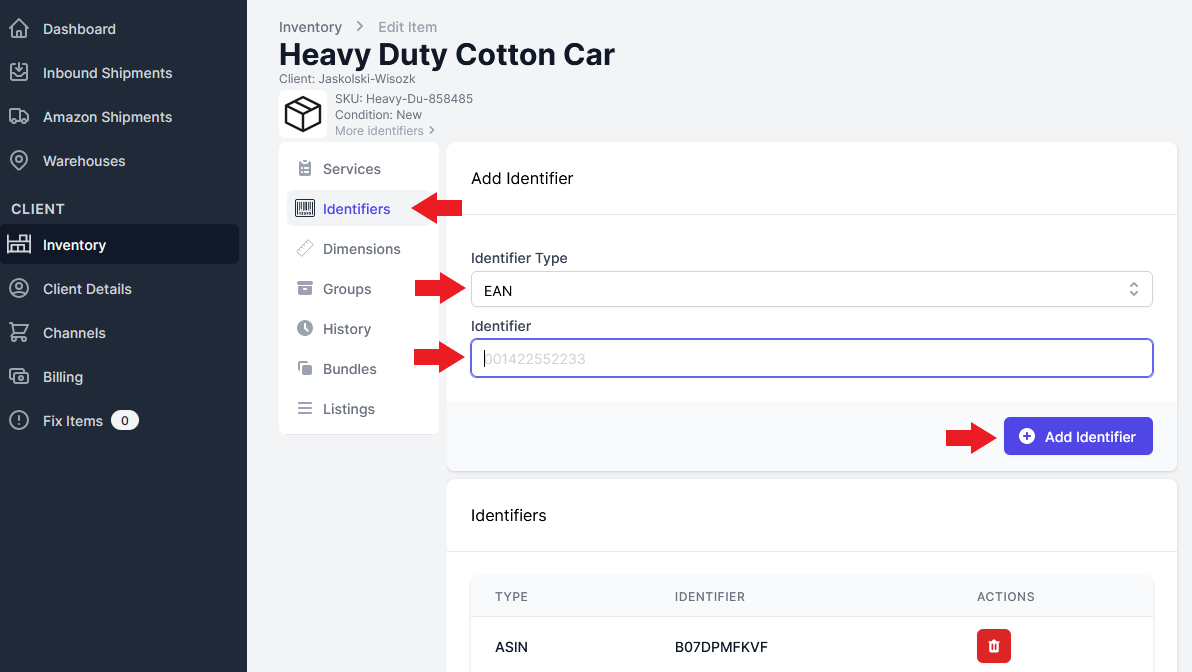
Identifier
You can add multiple Identifiers to an Inventory item and customize them so that they fit with your warehouse’s organization method. To add an Identifier to an Inventory item, follow this process:
- Select the item of Inventory you want to add an identifier to.
- Select the Identifiers page.
- Click the “Identifier Type” drop-down box to choose the type of identifier you want.
- Enter your identifier in the “Identifier” text box.
- Select “Add Identifier” to finish.
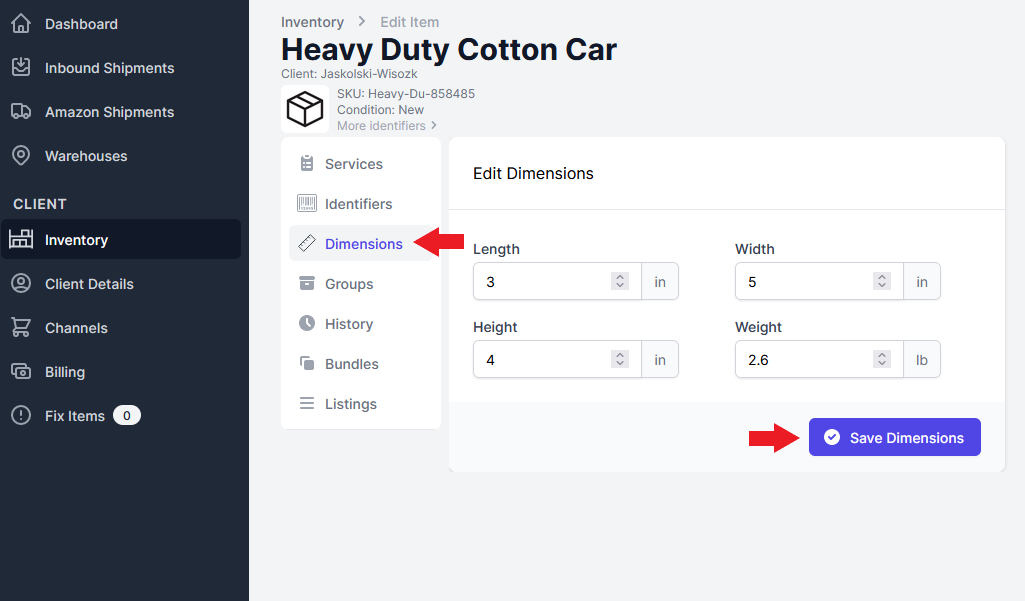
Dimensions
Dimensions are automatically imported from Amazon if they are available, but you can also set them manually. To change the dimensions of an Inventory item follow this process:
- Select the item of Inventory that you want to change dimensions for.
- Select the Dimensions page.
- Adjust the Length, Width, Height, and Weight values to the new dimension size.
- Select “Save Dimensions” to finish.
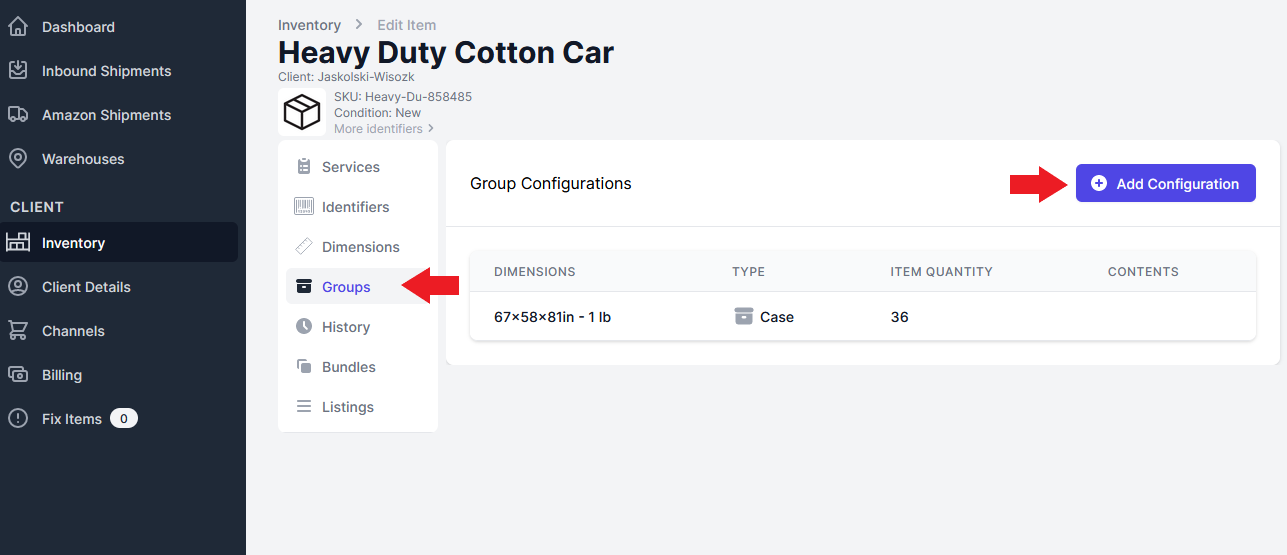
Groups
Item Groups (Cases & Pallets) are used in shipments to package large groups of that item together. This prevents the items from getting sent to different warehouses. To add a group configuration for an Inventory item follow this process:
- Select the item of Inventory that you want to add a case size to.
- Select the Groups page.
- Click the “Add Configuration” button.
- Within the Group Configuration enter the Item Quantity and dimensions of the new case or pallet.
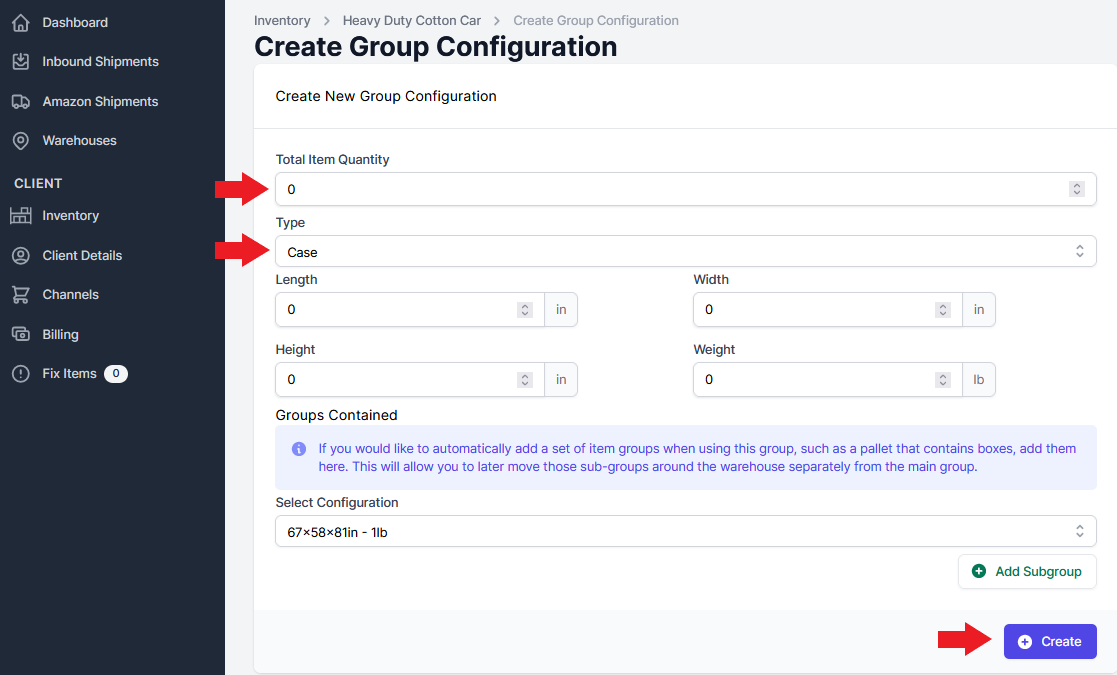
- Select “Create” to add the new case size.
Bundles
Bundles enable your clients to sell their items in “sets”. A bundle can contain a bunch of the same item or multiple different items. To create a bundle for an Inventory item follow this process:
- Select the item of Inventory that you want to create a bundle for.
- Select the Bundles page.
- Click the “Convert to Bundle” button.
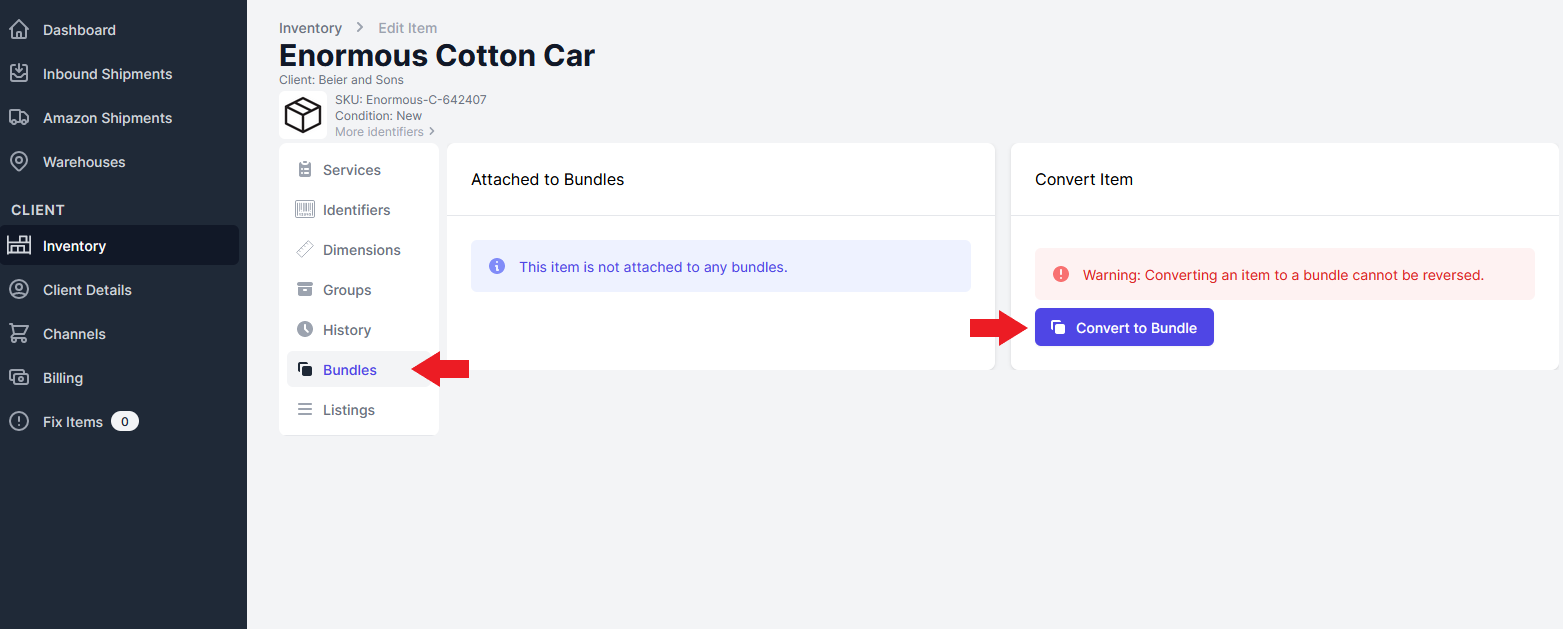
Note: Converting an item to a bundle cannot be reversed.
- To customize your bundle select “Add Items to Bundle”.
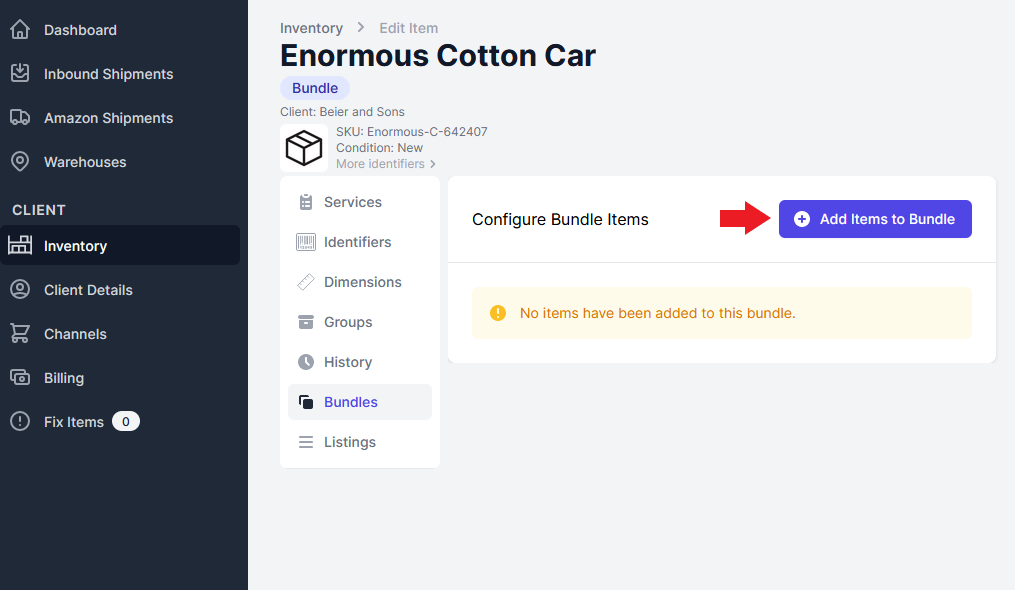
- Select the items you want to add. Once an item is selected you can use the arrows beside the it to indicate the quantity of that item you want in the bundle.
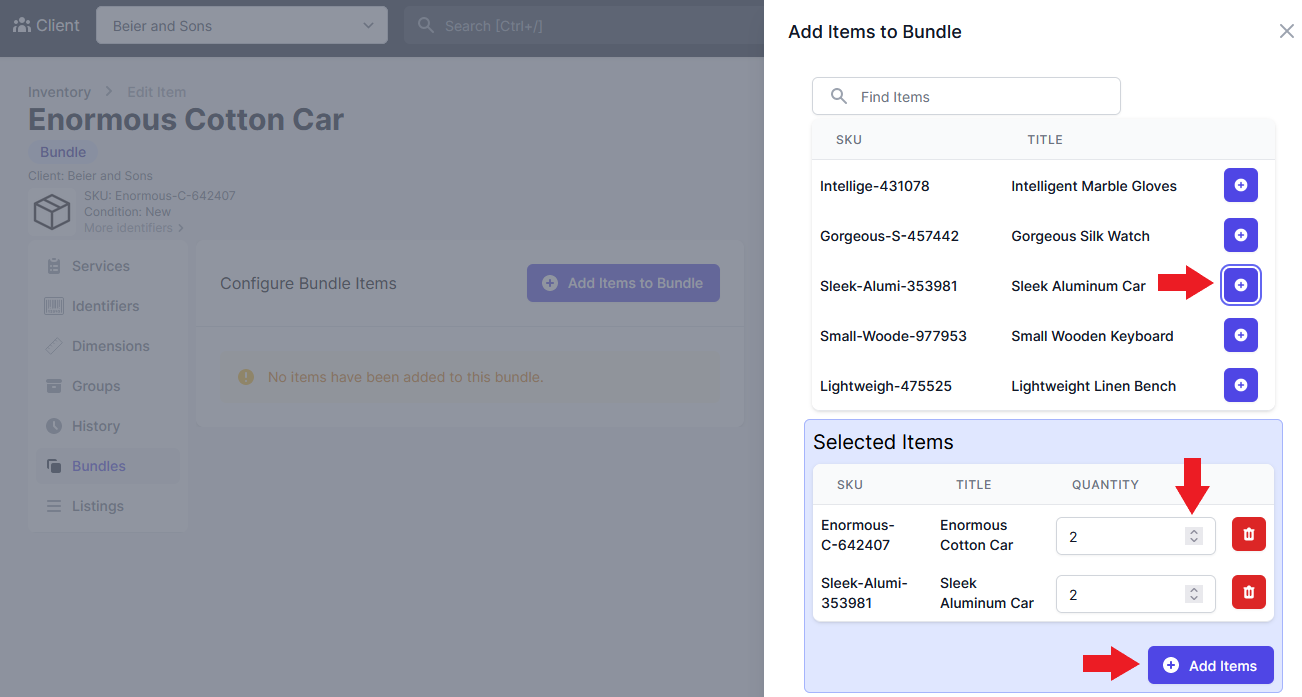
- Once you have configured your bundle select “Add Items” to finish.
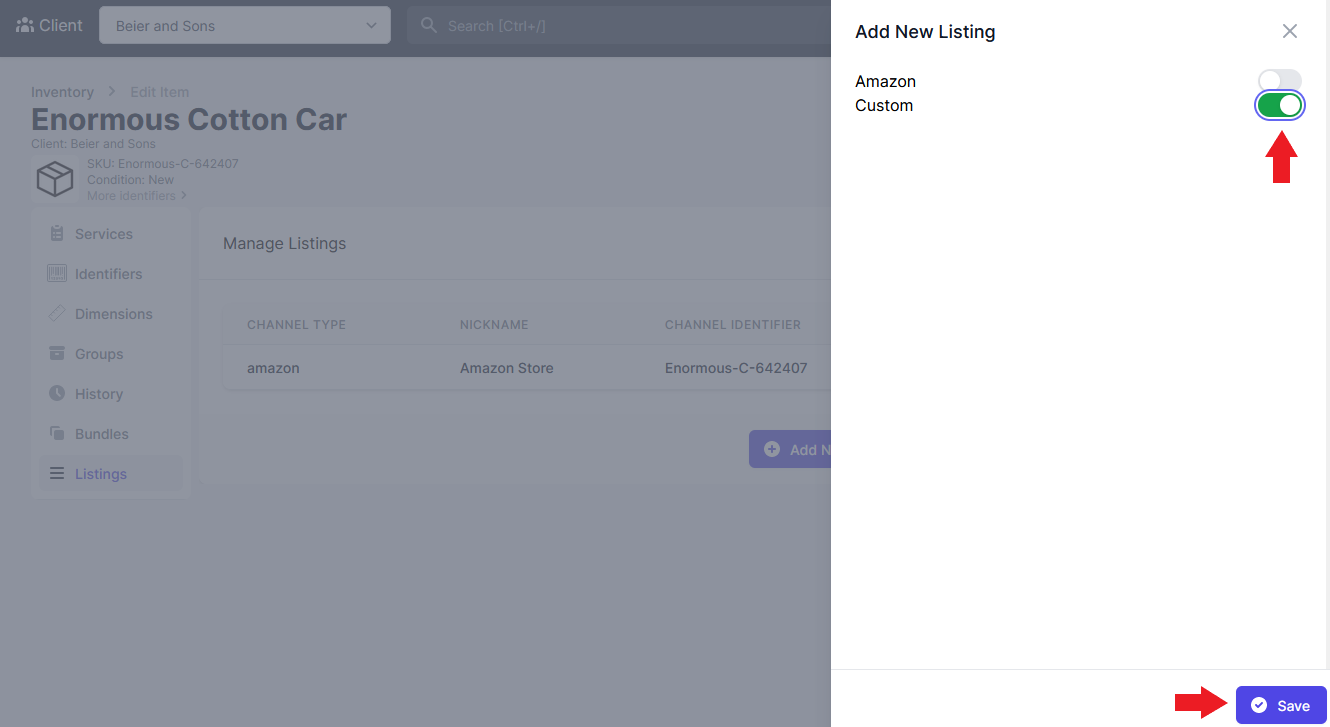
Listings
To add a new listing on your channels for an Inventory item, follow this process:
- Select the item of Inventory that you want to list.
- Select the Listings page.
- Click the “Add New Listing” button.
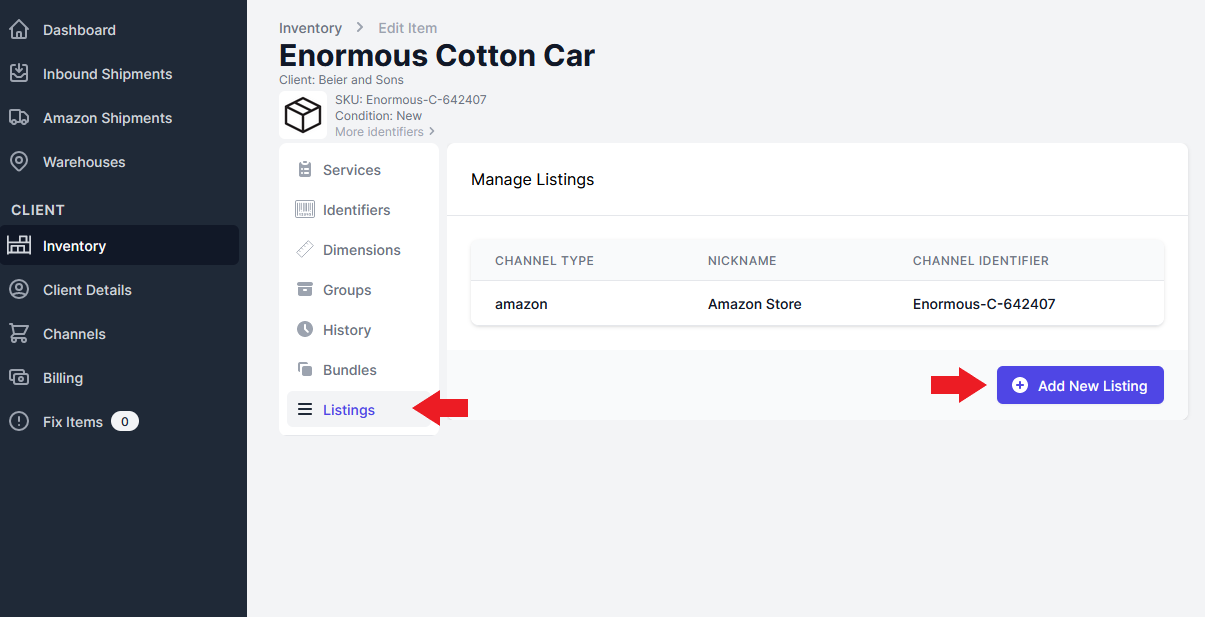
- Select the channel (or channels) that you want to add it to and select “Save”.