Track Inventory
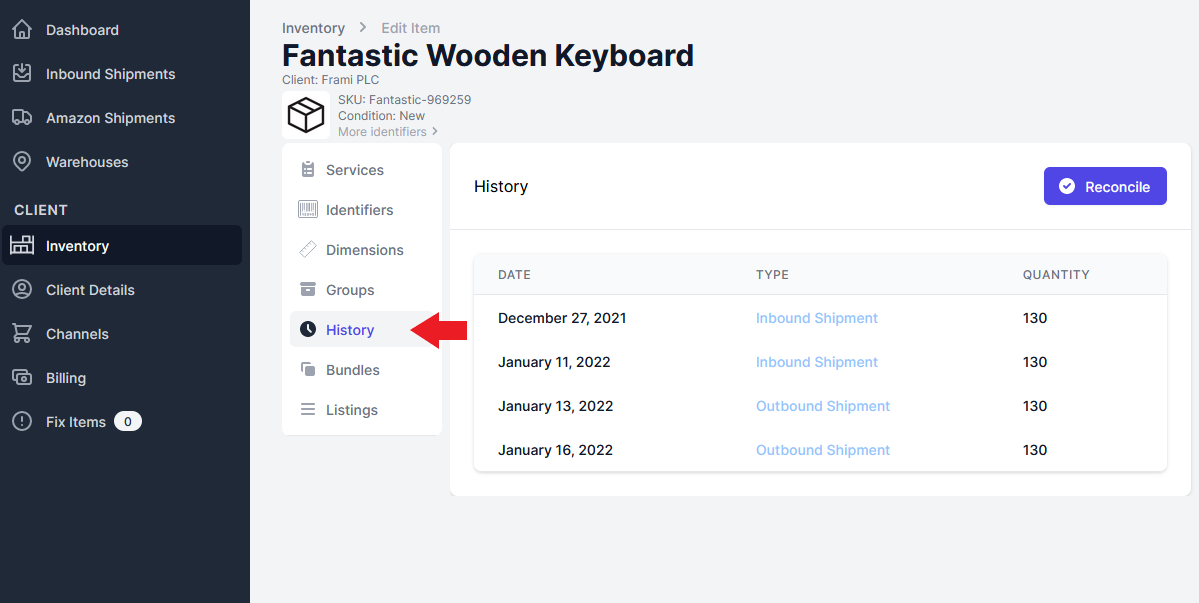
Access Item’s History
Viewing an item’s history can help track the item if its quantities were lost or messed up. To access an Inventory item’s history follow these steps:
- Open the Inventory item you want to track.
- Select the “History” page. On this page you can see when the item was shipped in and out from your warehouse as well as any reconciliations made on the item.
Add adjustments to Inventory items
You will want to adjust items’ quantity records when items are lost, found, damaged etc. Here are the steps to make such an adjustment:
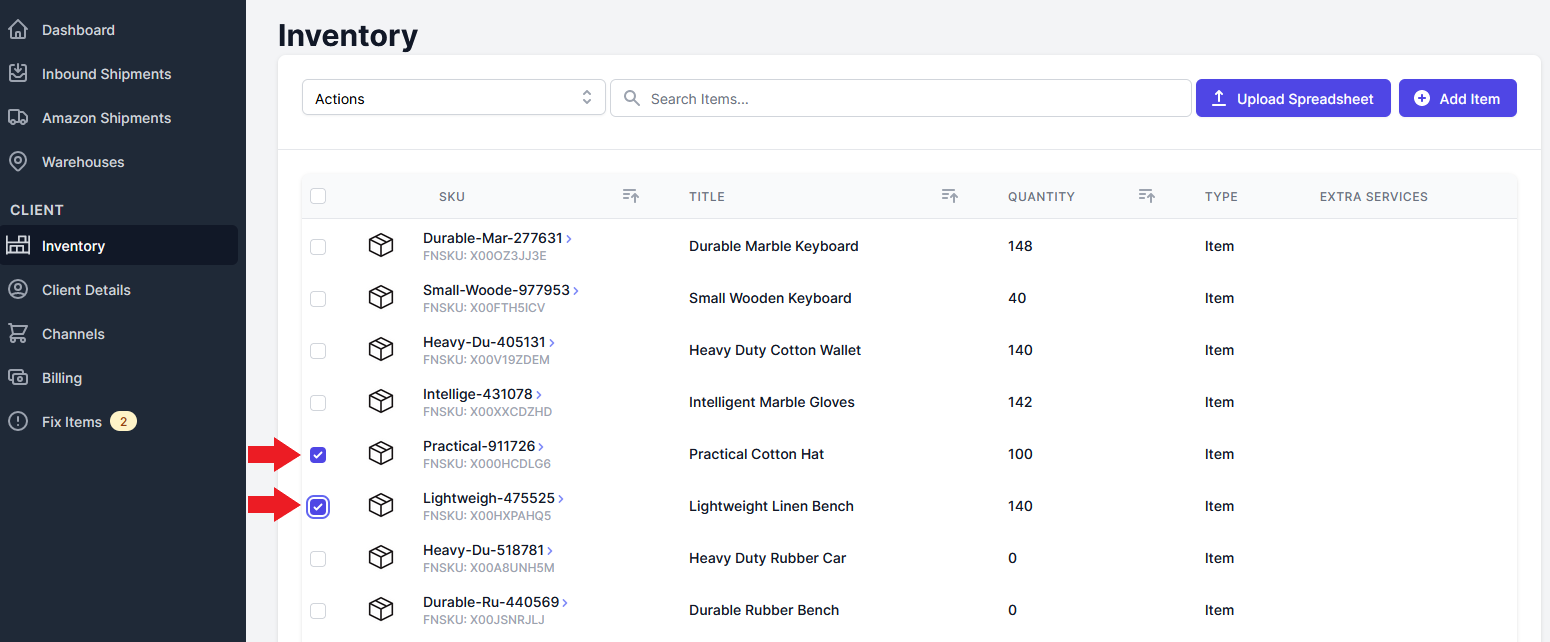
- Open the Inventory page and select the items you want to add adjustments to. If you are recording adjustments to multiple items at a time, all items will receive the same adjustment.
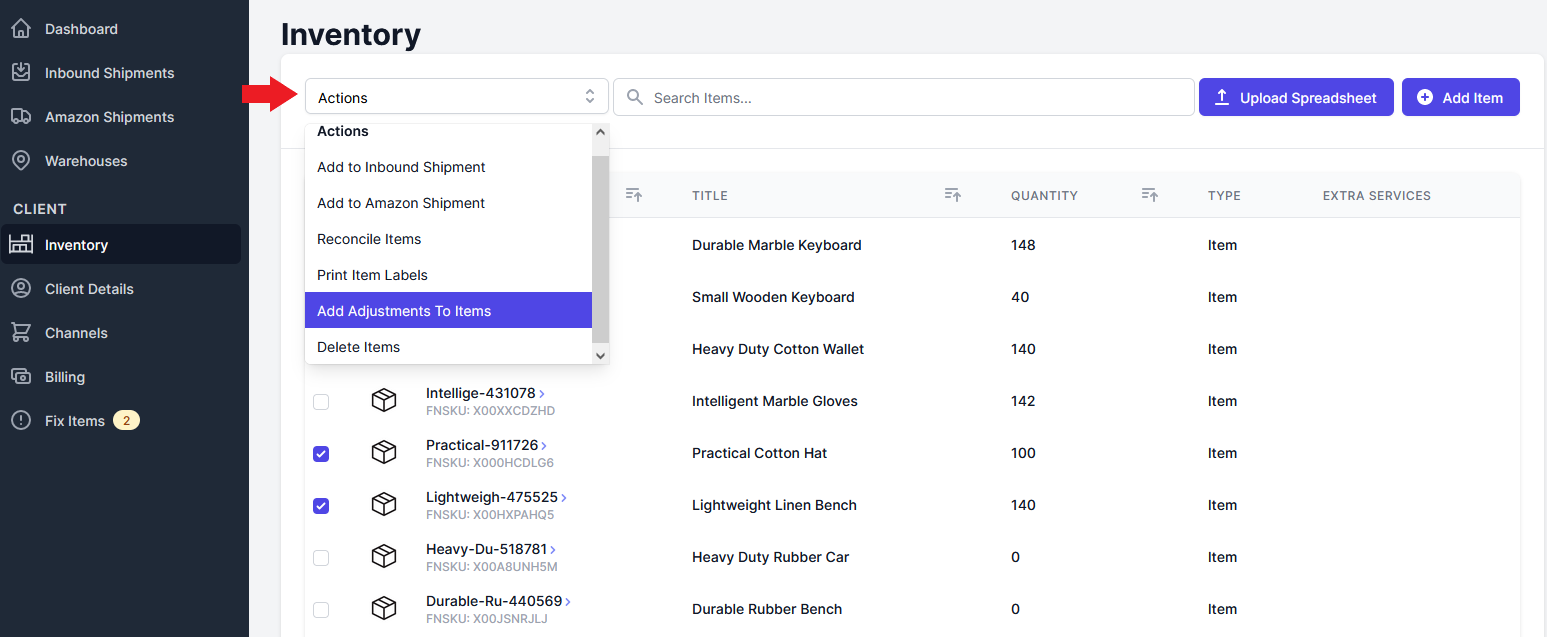
- Select the “Actions” drop-down box and choose “Add Adjustments To Items”.
- Next, enter in the Reason and Quantity of the adjustment you are making. At this point you can also add extra notes to the adjustment.
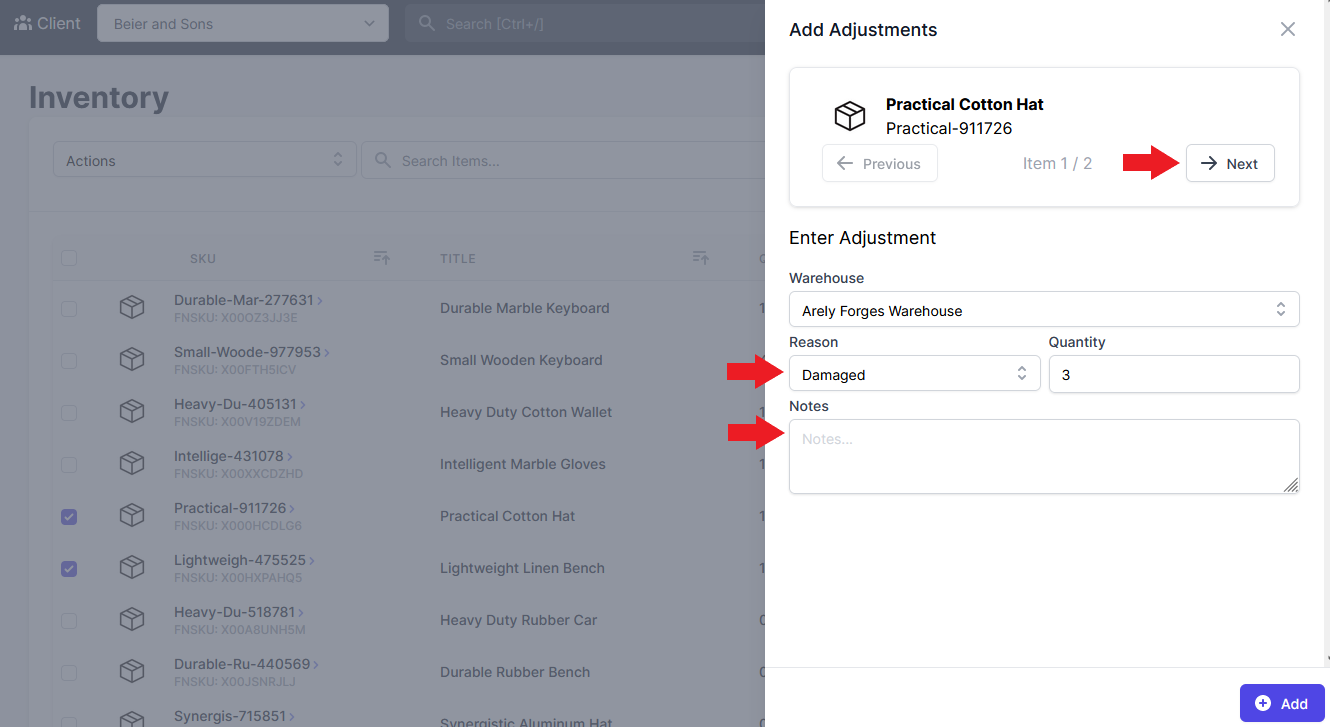
- If you are adjusting more than one item you can click “Next” to access the next item. Notice that the adjustment information is the same as for the previous item.
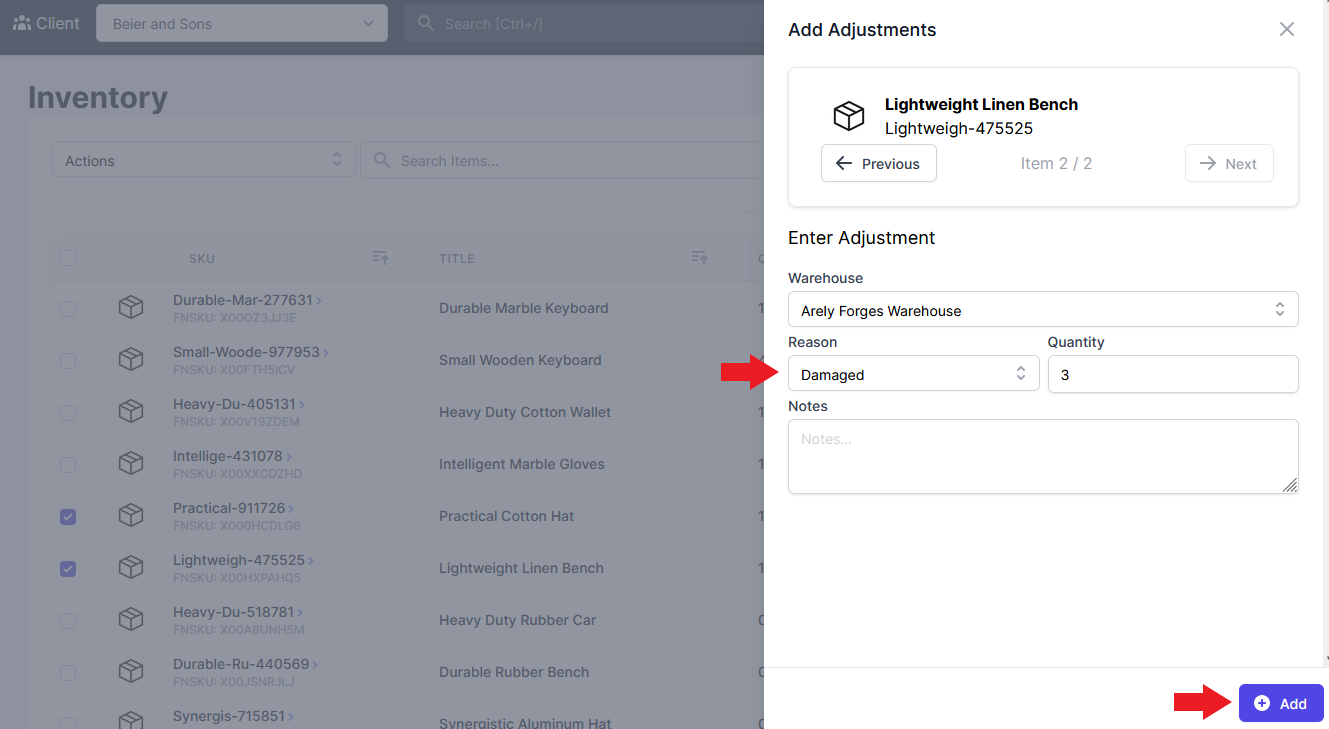
- Select “Add” to save your changes.
Fix damaged or lost items
If you recorded any items as “unsellable” because they were damaged or lost, etc., they will appear on the Fix Items page. To deal with these items follow this process:
- Any unsellable items will appear on the Fix Items page. If there is a number beside the “Fix Items” page name, there are items that need fixing.
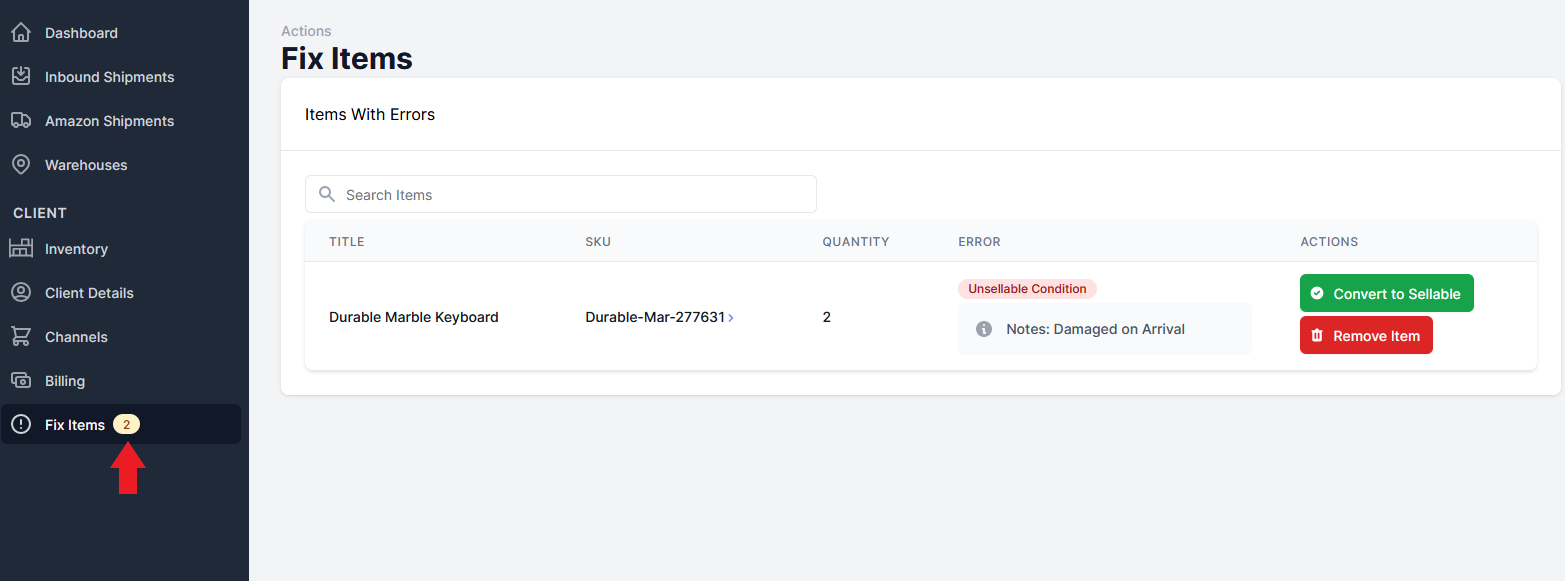
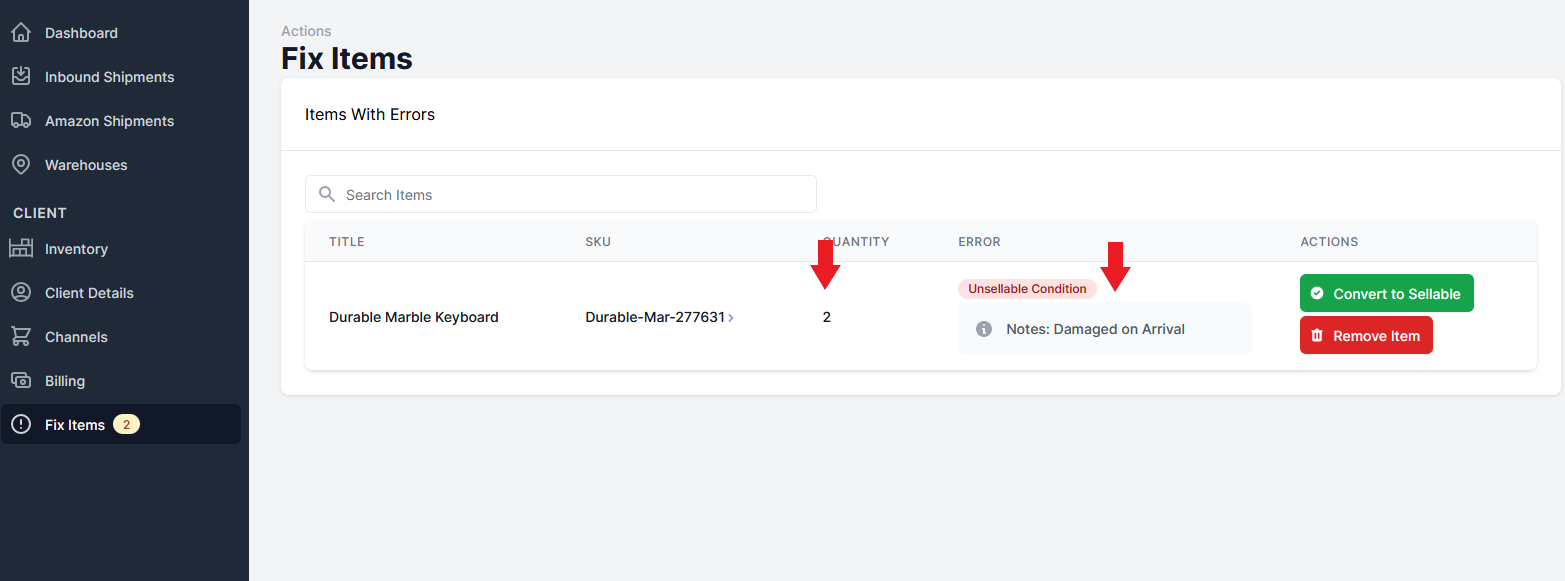
- On the Fix Items page you can see the quantities of unsellable items and any notes you made previously on the items’ conditions.
- These items can be left in the Fix Items page until you have assessed them and consulted your client on a course of action. If you decide that the items are not fixable you will want to remove them from your records. To do this, select the red “Remove Item” button beside the desired item.
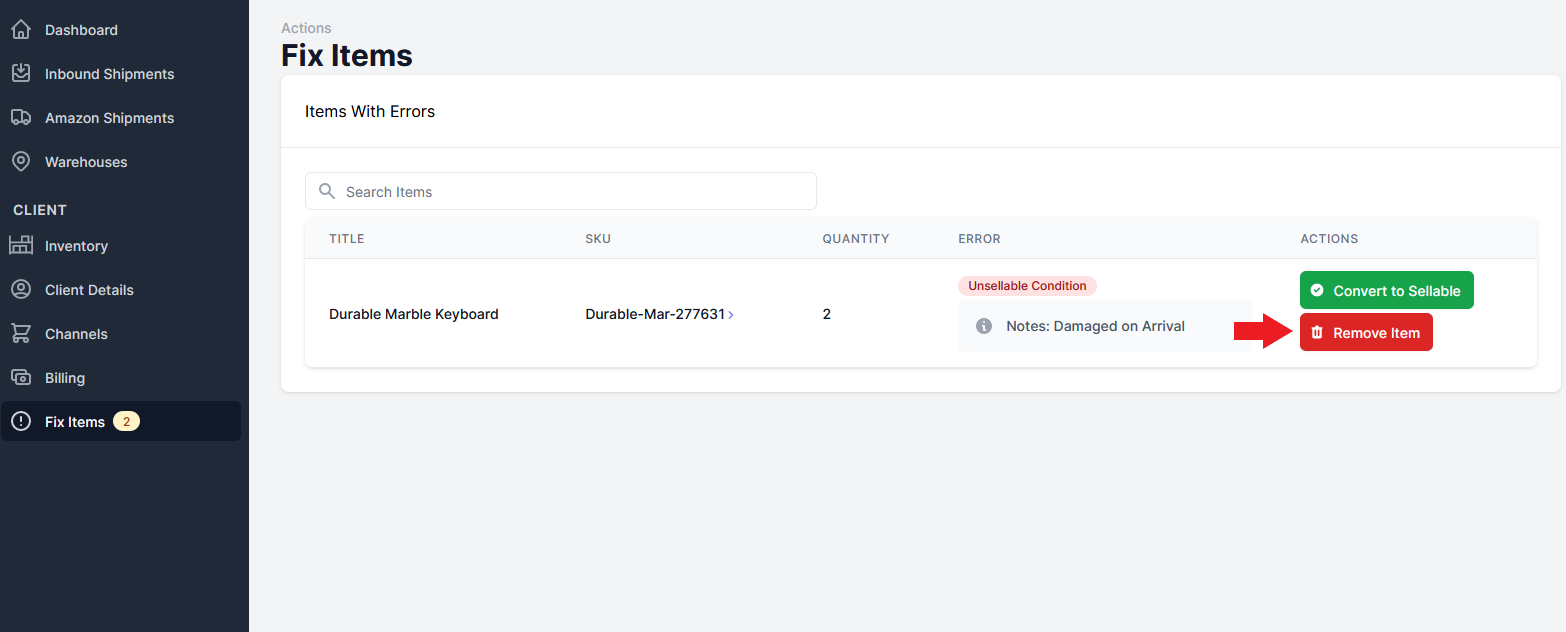
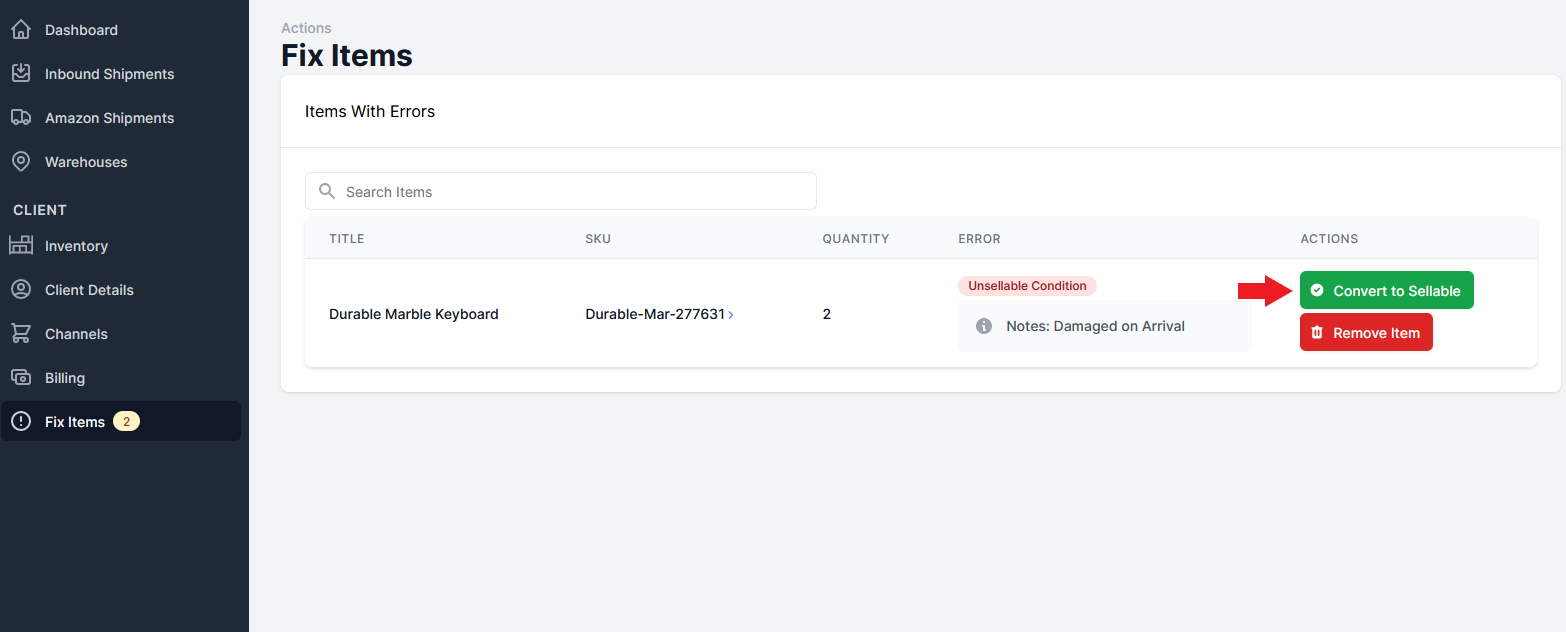
- On the other hand, if you were able to fix the item and it is returning to stock, select the “Covert to Sellable” button beside the item.
- A page will slide over. Here, enter in the quantity that was fixed and how much is being charged per item for the fix.
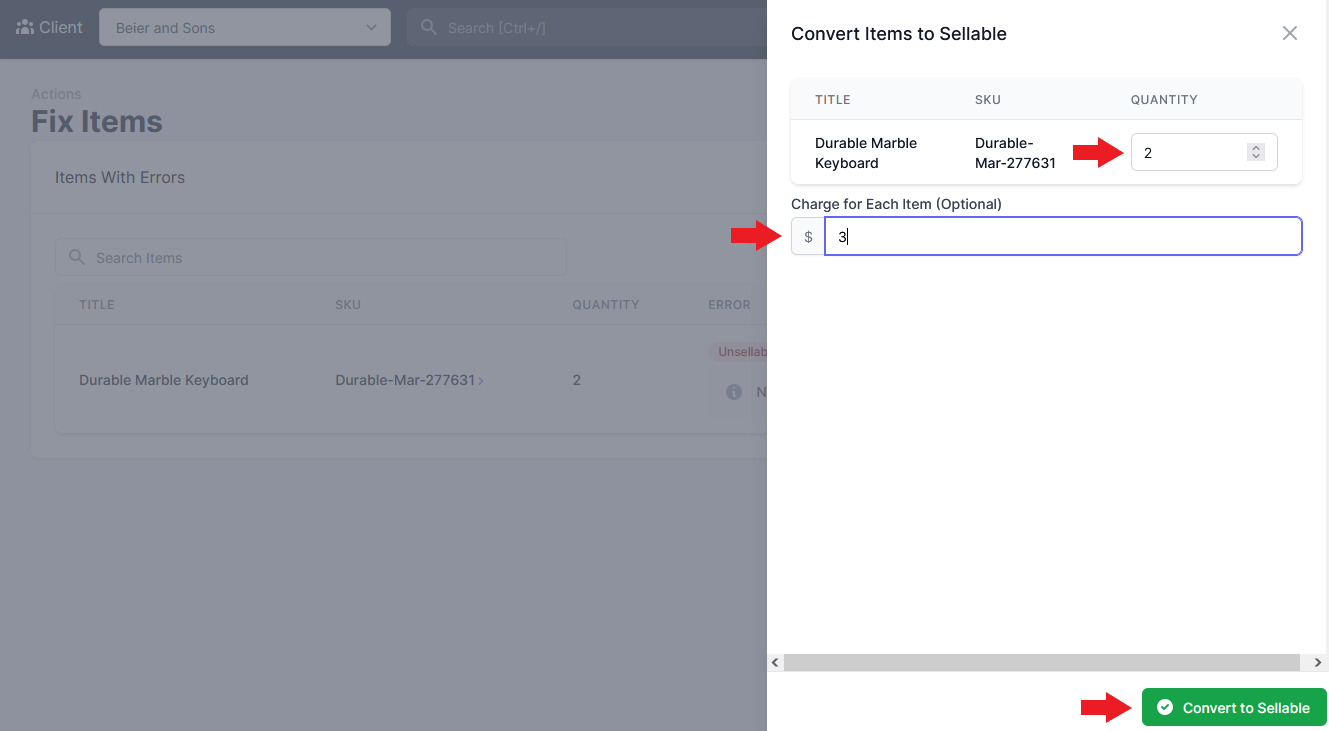
- Select “Convert to Sellable” to finish.
Reconcile Inventory
The Reconcile tool makes it easy to check if what is stored in your warehouse coincides with your Inventory records.
To use the Reconcile tool follow this process:
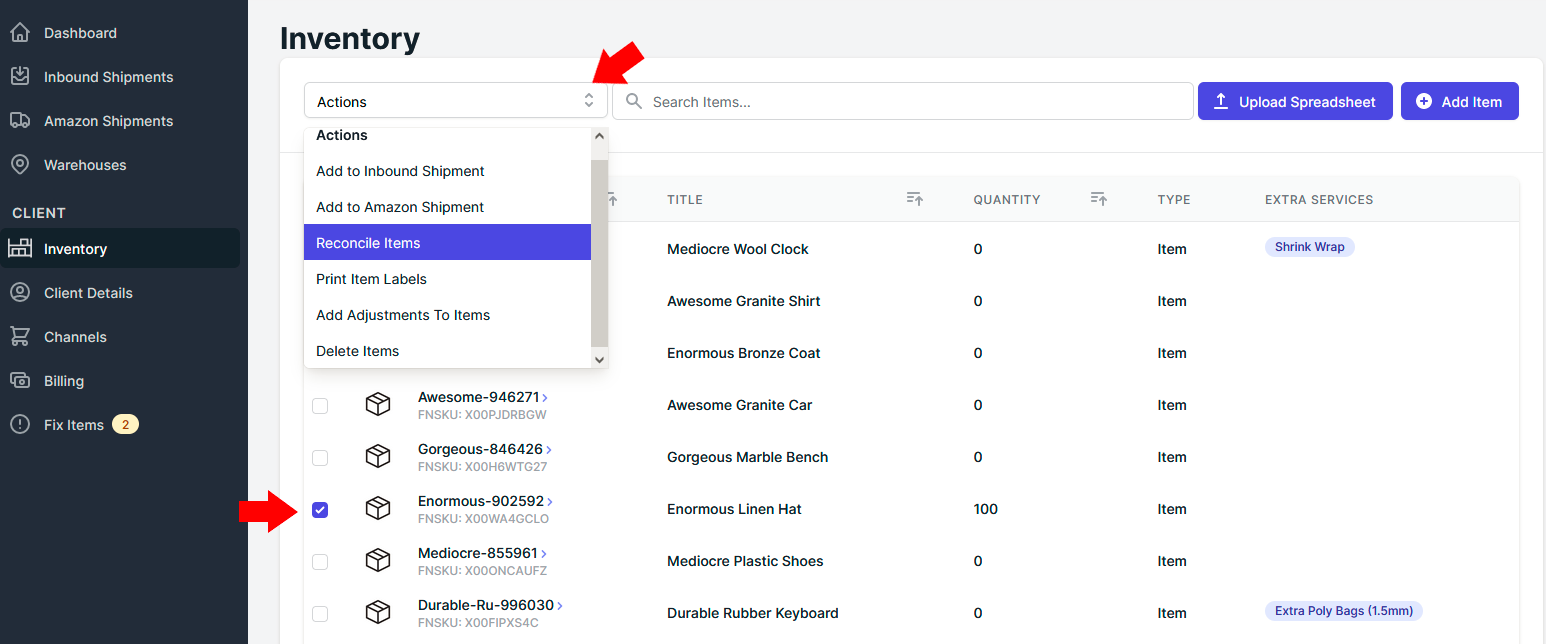
- Select any amount of items on the Inventory page
- Select the “Actions” drop-down box and select “Reconcile Items”
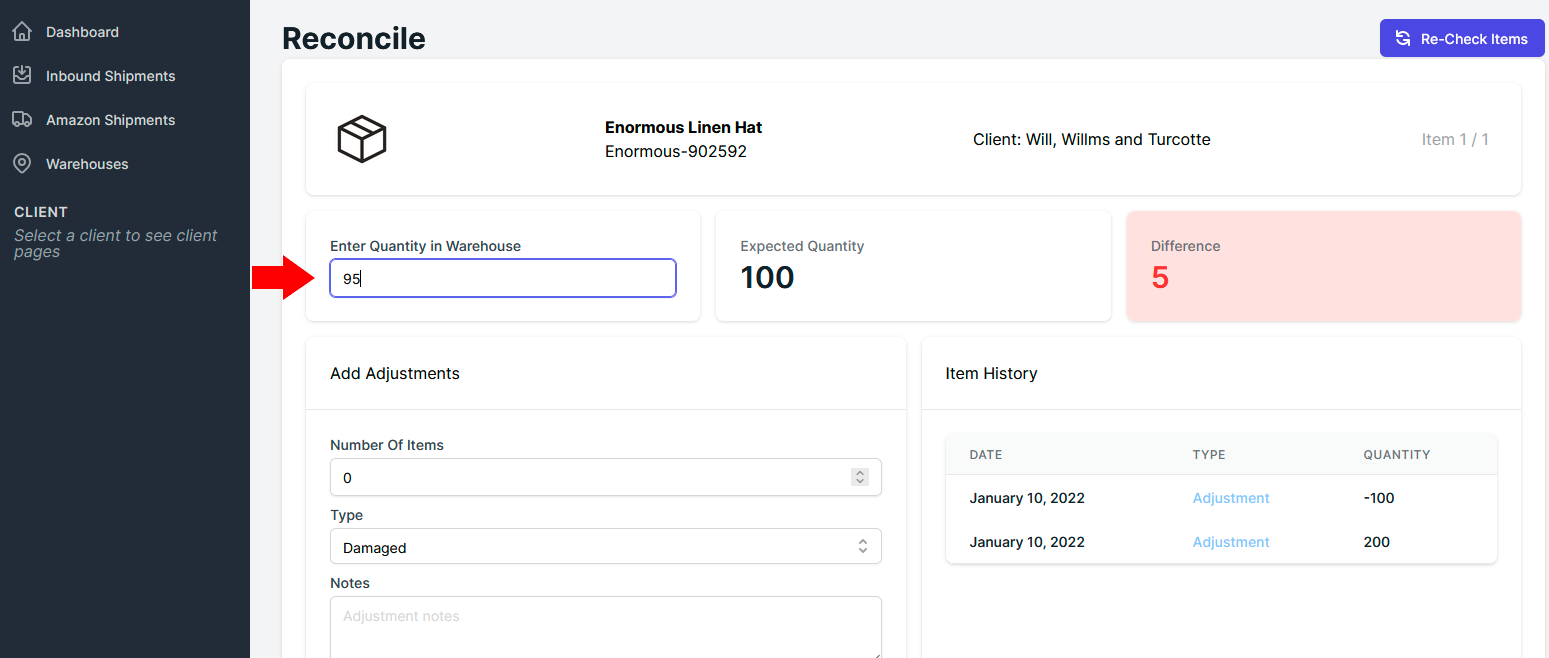
- The Reconcile page displays the Expected Quantity of an item in your warehouse. This is the number in your inventory records. To use the tool, enter the actual quantity of that item that is in your warehouse. The difference between the expected amount and the actual amount will then be displayed in the “Difference” section. In the example below, the expected quantity of Linen Hats in the warehouse is 100, but the actual amount is 95 resulting in 5 missing hats.
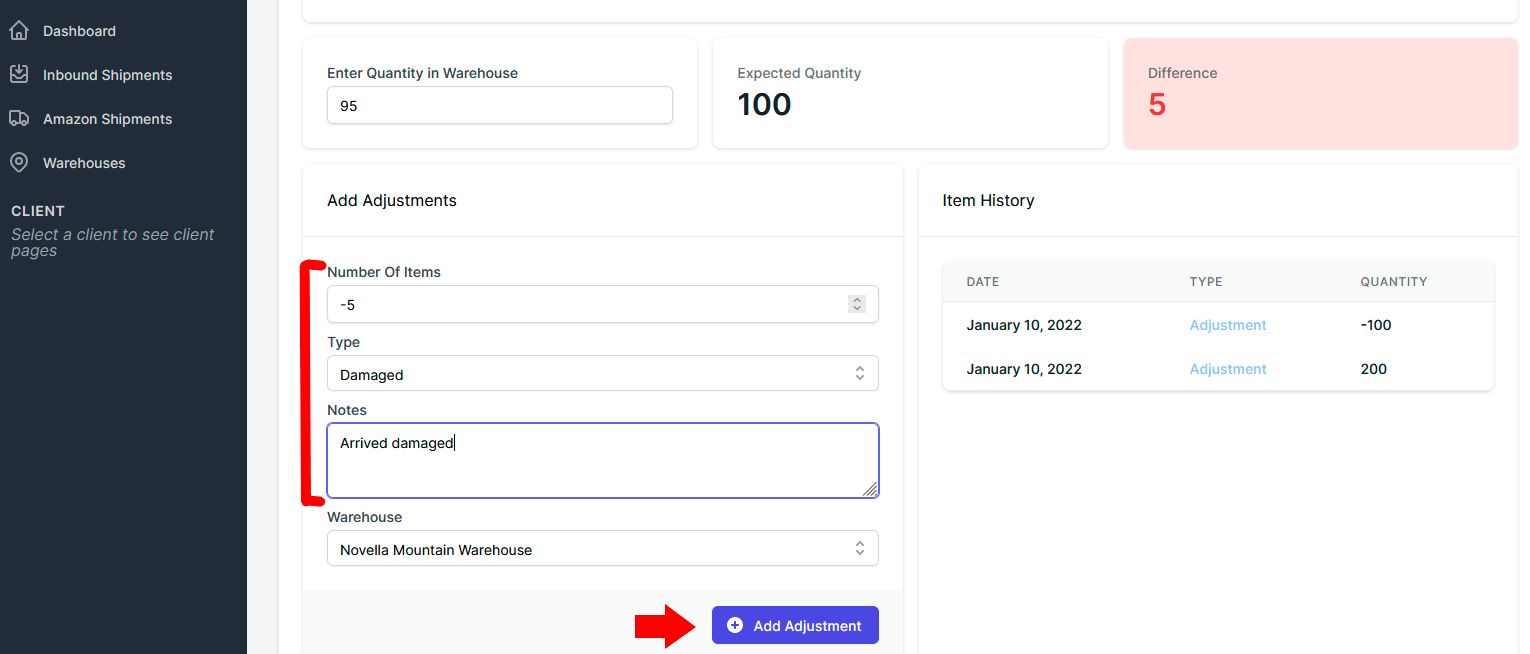
- To equalize these quantities you must account for the 5 missing hats. Under the Add Adjustments section we enter “-5” in “Number of items” input box.
- Then, we select “Type” drop-down menu to specify what happened to the hats. Let’s say that the five hats were damaged during transit. In this case we will select “Damaged”.
- You can also add any extra notes for more specific information on the missing hats.
- Once you have entered all the adjustment information, select “Add Adjustment” to save your changes.
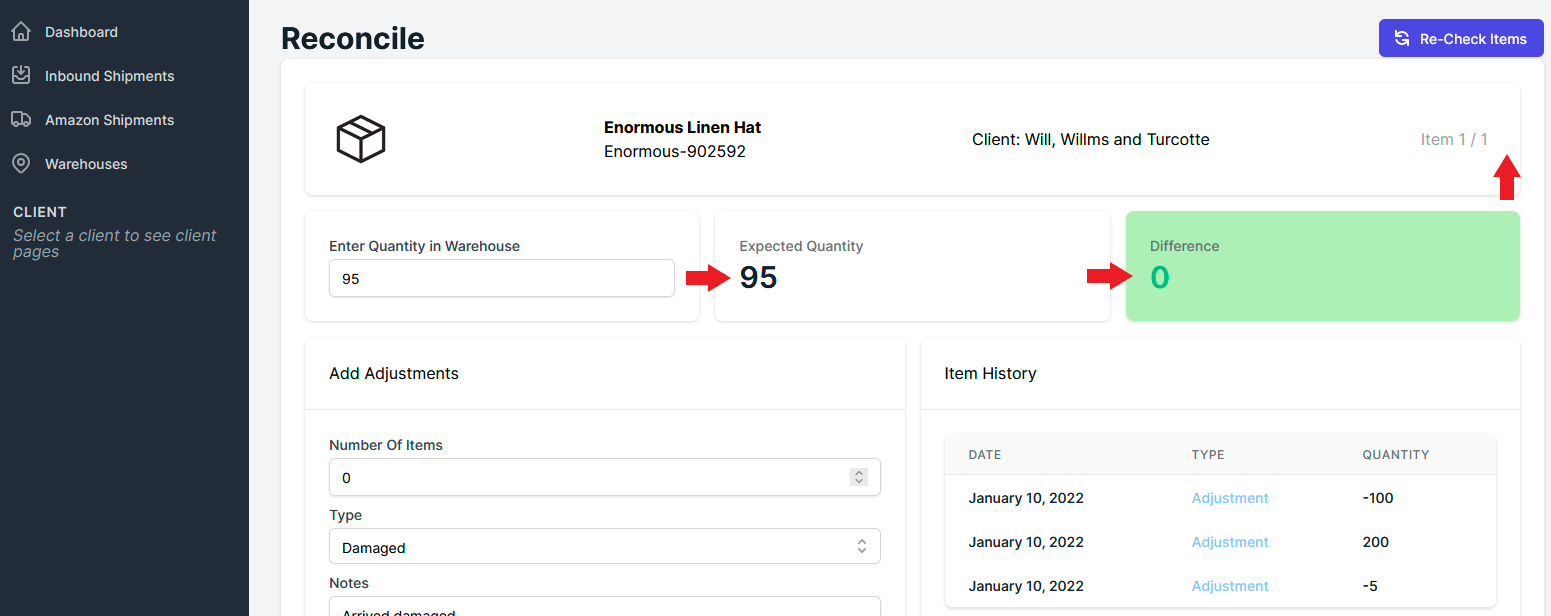
- The Expected Quantity of hats should now be adjusted to 95 because the 5 damaged hats are registered in the system. If you selected more than one item to reconcile, click on the “Next” button in the top right corner to reconcile the next item.
You can access the Reconcile tool in two other places:
#1
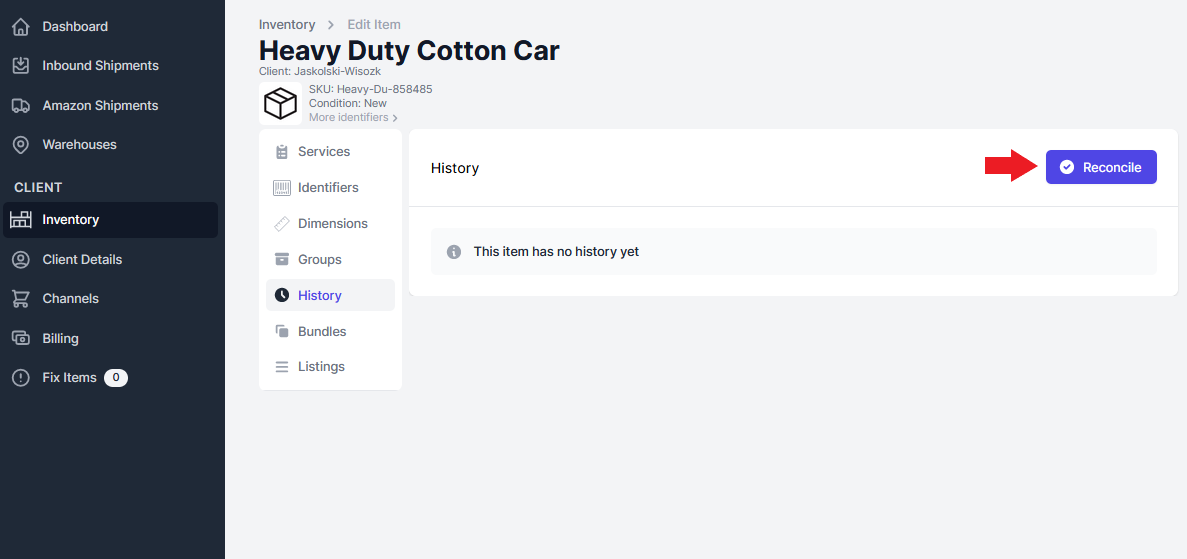
- Open the Inventory item you want to Reconcile.
- Select the “History” page.
- Click the “Reconcile” in the top right corner.
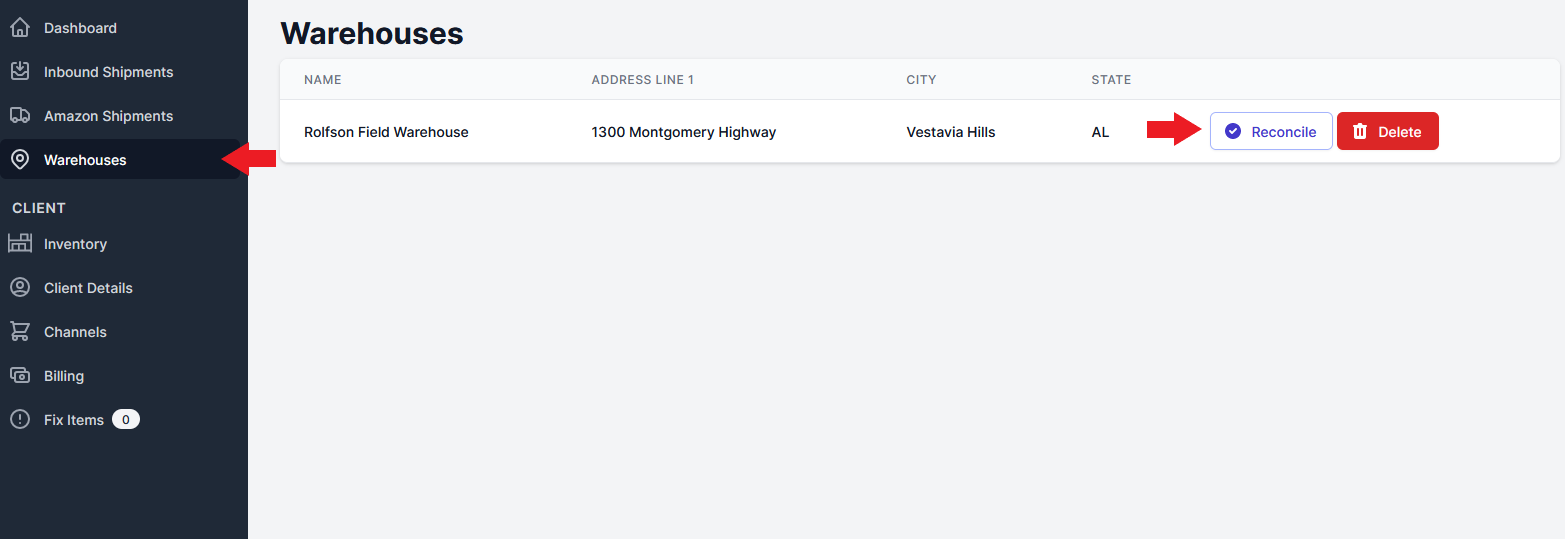
#2
- Navigate to the “Warehouse” page and select the “Reconcile” button beside your warehouse.
- You will be brought to the Reconcile tool with a list of items from your warehouse that need to be reconciled.